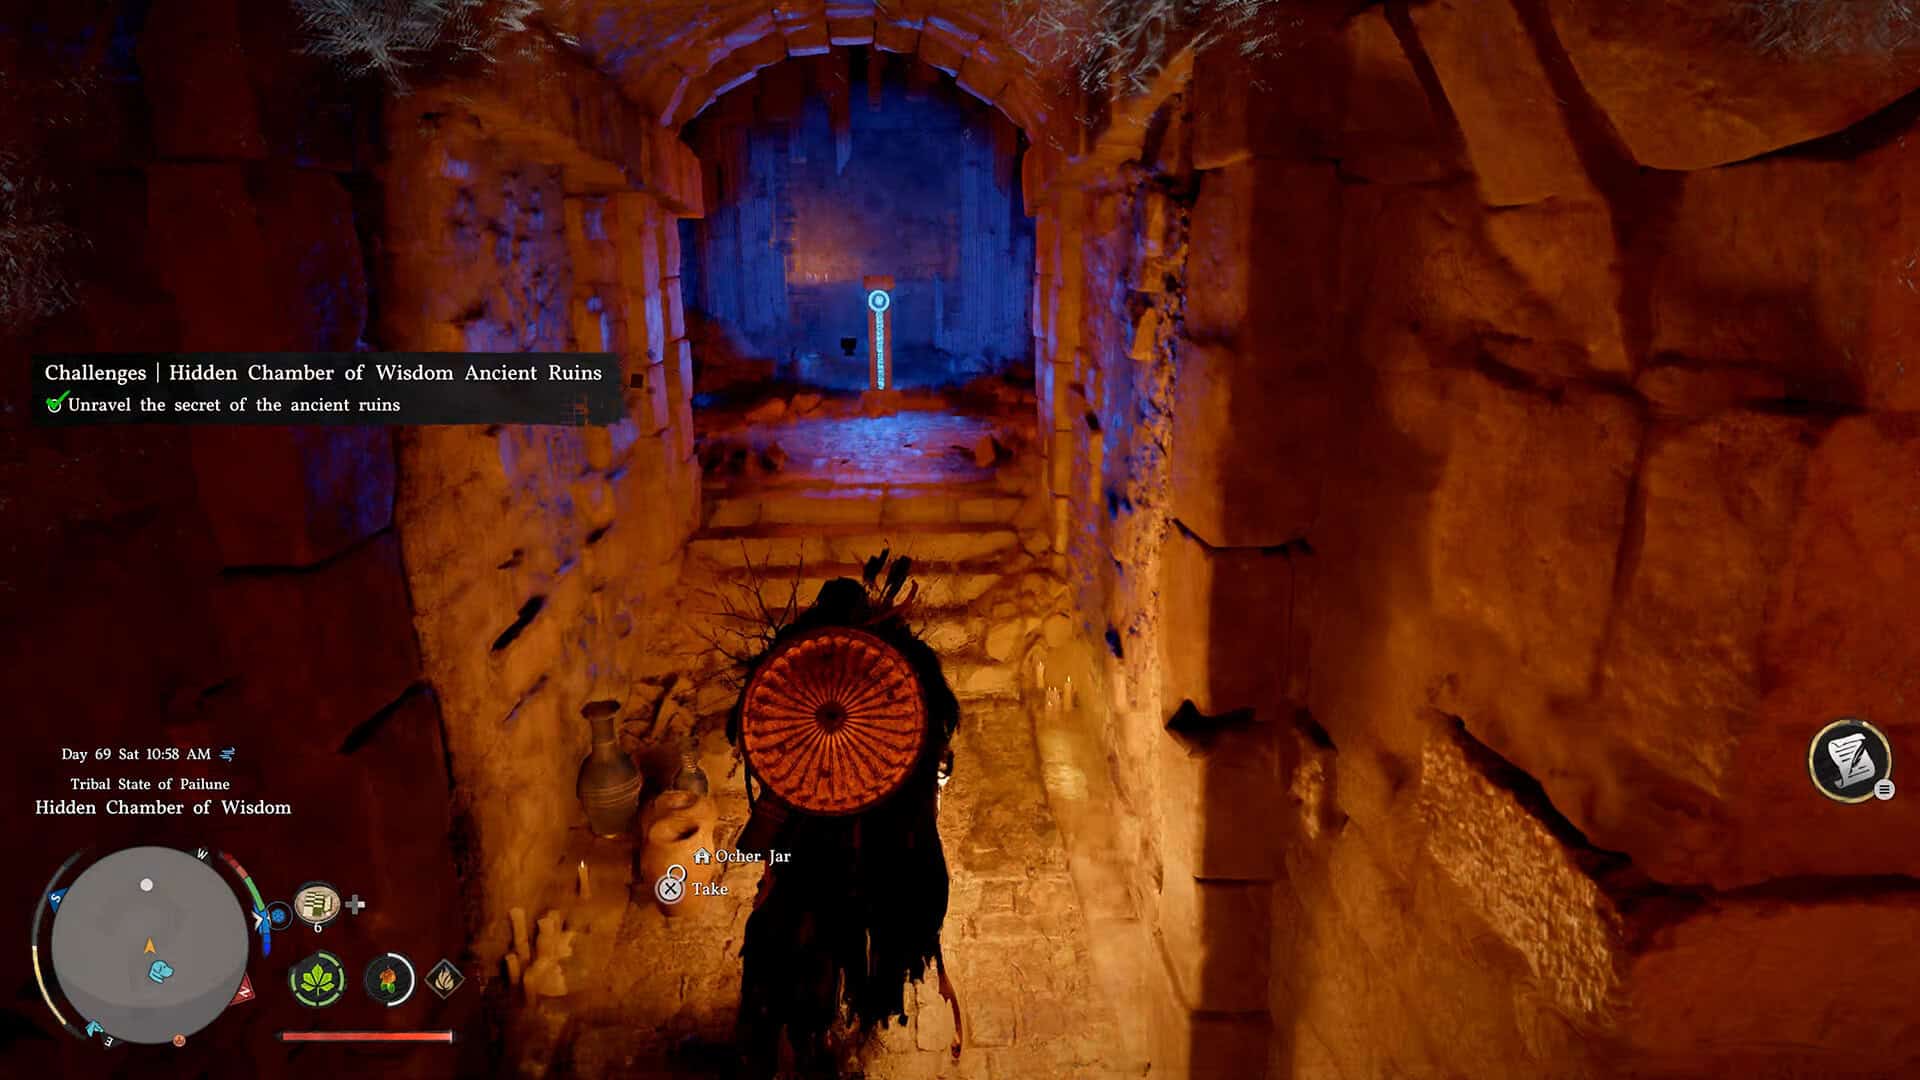
The Hidden Chamber of Wisdom is a puzzle you need to solve in Crimson Desert to earn an Abyss Artifact, and the good news is that it is a lot simpler than it first appears. Follow this guide step by step and you will walk out of those ruins with your artifact, a brand new fast travel point activated, and a useful item called Memories of the Northern Wind that reveals hidden locations on your map.
Hidden Chamber of Wisdom Location in Crimson Desert (Silver Wolf Mountain)
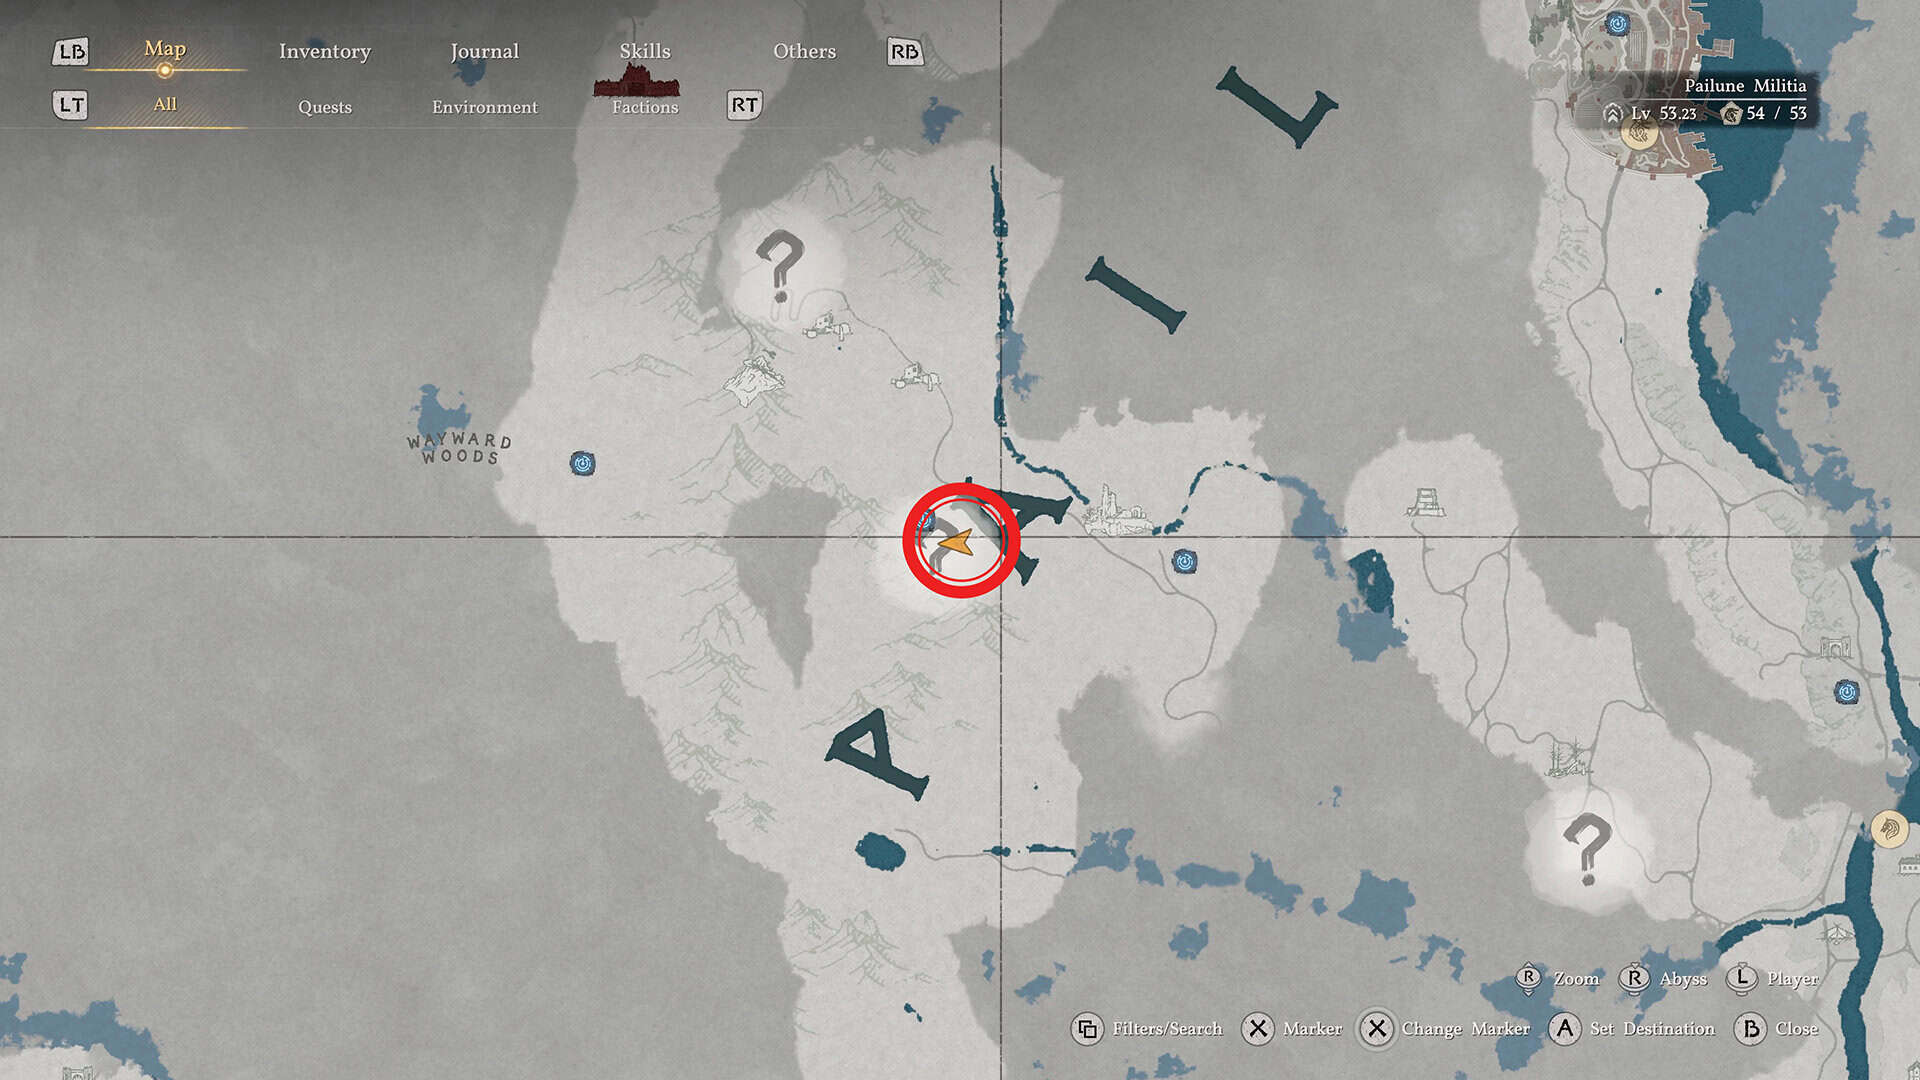
The Hidden Chamber of Wisdom sits in the Silver Wolf Mountain area of Pailune, which is the Tribal State of Pailune region. On your map, find the letter “A” in Pailune, and the chamber will be marked as a large question mark just to the west of it. When you get close, look for a large painting on the side of the cliff face. Right beside that painting you will find the entrance to the cave, on the north wall near the road. Head inside and follow the tunnel through, and you will reach the Hidden Chamber of Wisdom ruins.
How to Find the Four Symbol Markers Using the Hidden Chamber Mural Map
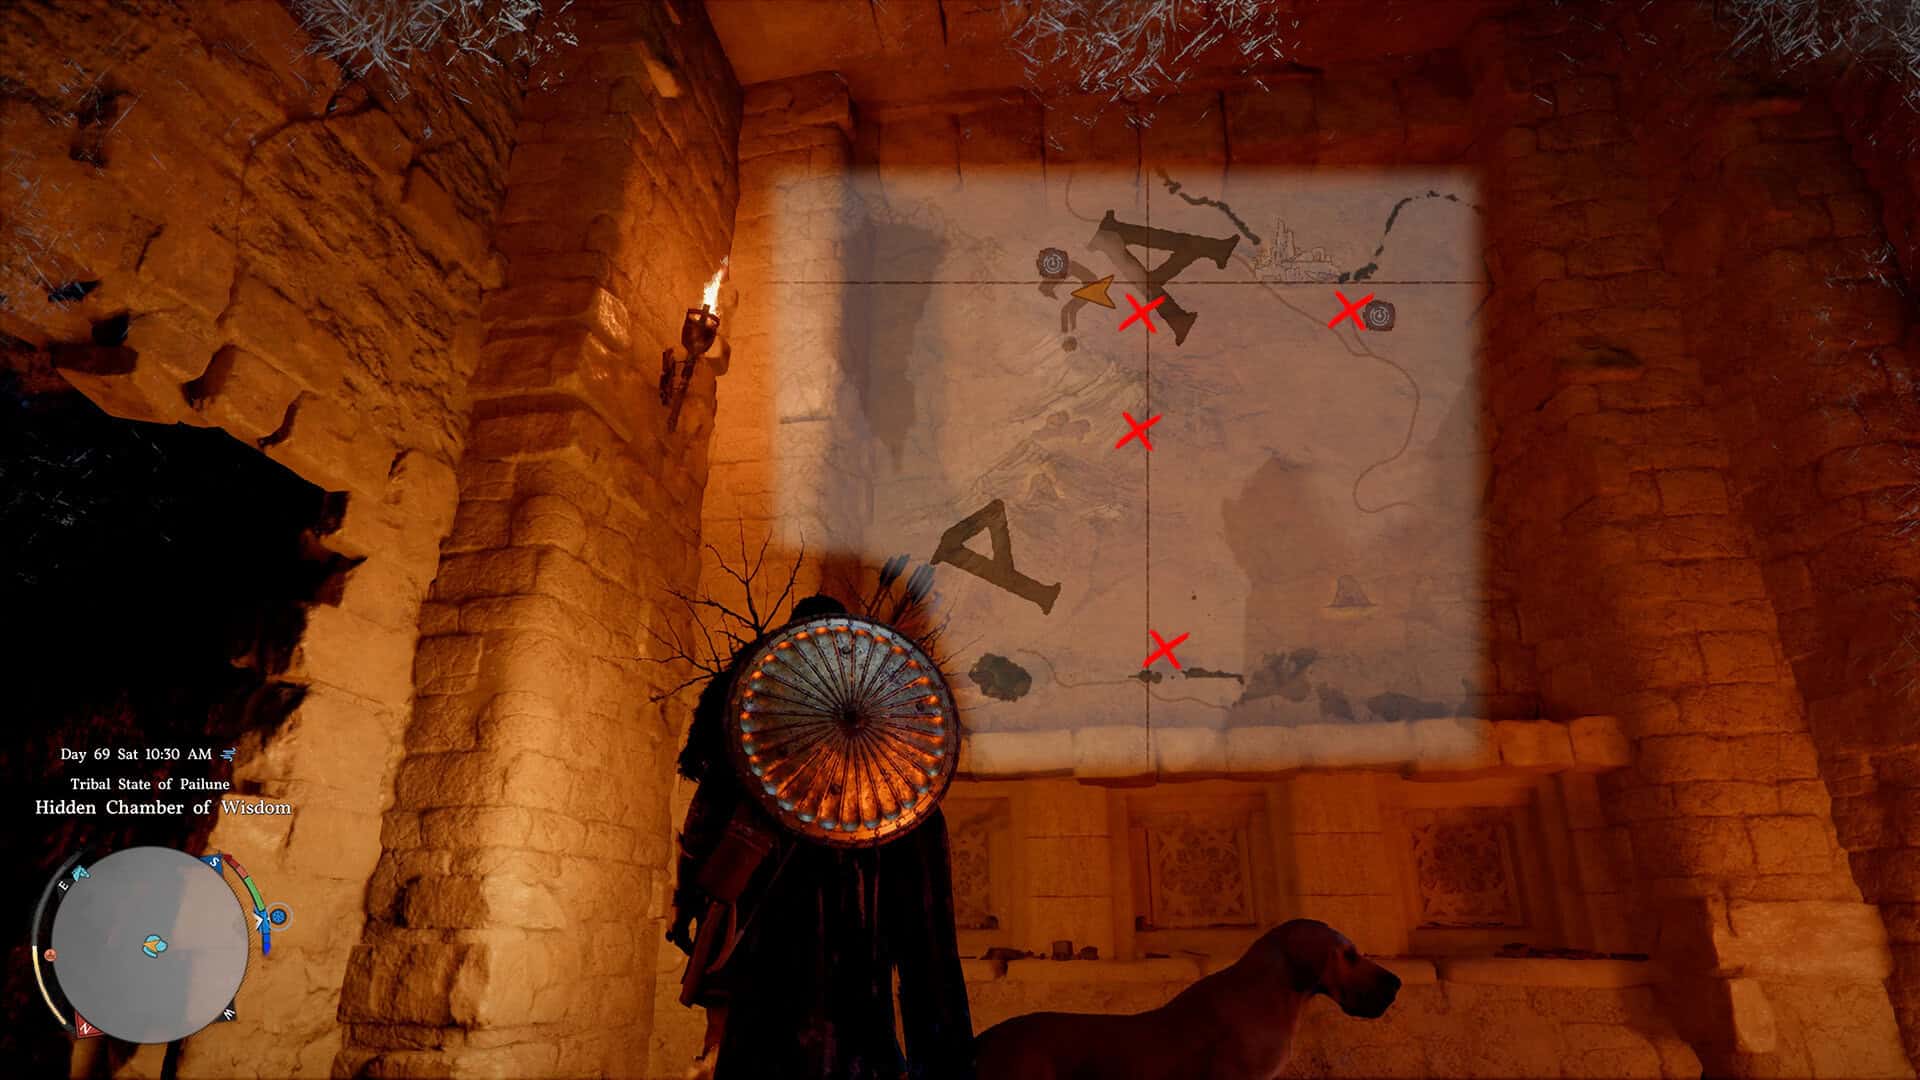
Once you are inside, look to the wall and you will see a large mural map. On it there are four markers, each one marked with a red cross, and each corresponds to a real location out in the world around the chamber. You do not have to go visit all of them yourself, but understanding what each marker represents is how you decode the puzzle panels later. The first marker is right by the cave entrance itself, where you will find a drawn symbol representing wind. Moving along, the second symbol is a lightning bolt. Then there is a water symbol at the next marked spot, and finally a fire symbol at the last one. Wind, lightning, water, and fire. That is the combination you need, and I suggest keeping it in mind as you push deeper into the ruins.
-

- Hidden Chamber of Wisdom Location
-
- Using the Hidden Chamber Mural Map
Crossing the Chasm: Watch Out for the Hanging Lamps
After you have taken a good look at the mural, continue through the cave. You will come to a chasm with a rope stretched across it, and yes, you can walk across that rope. The main thing to watch out for here is the lamps hanging from the ceiling overhead. They deal damage if they hit you, and they can actually knock you off the rope and down into the chasm, so keep an eye on when they are swinging your way as you cross. Take your time, and you will get to the other side without much trouble. The crossing itself is short, so once you know what to avoid, this part is no problem at all.
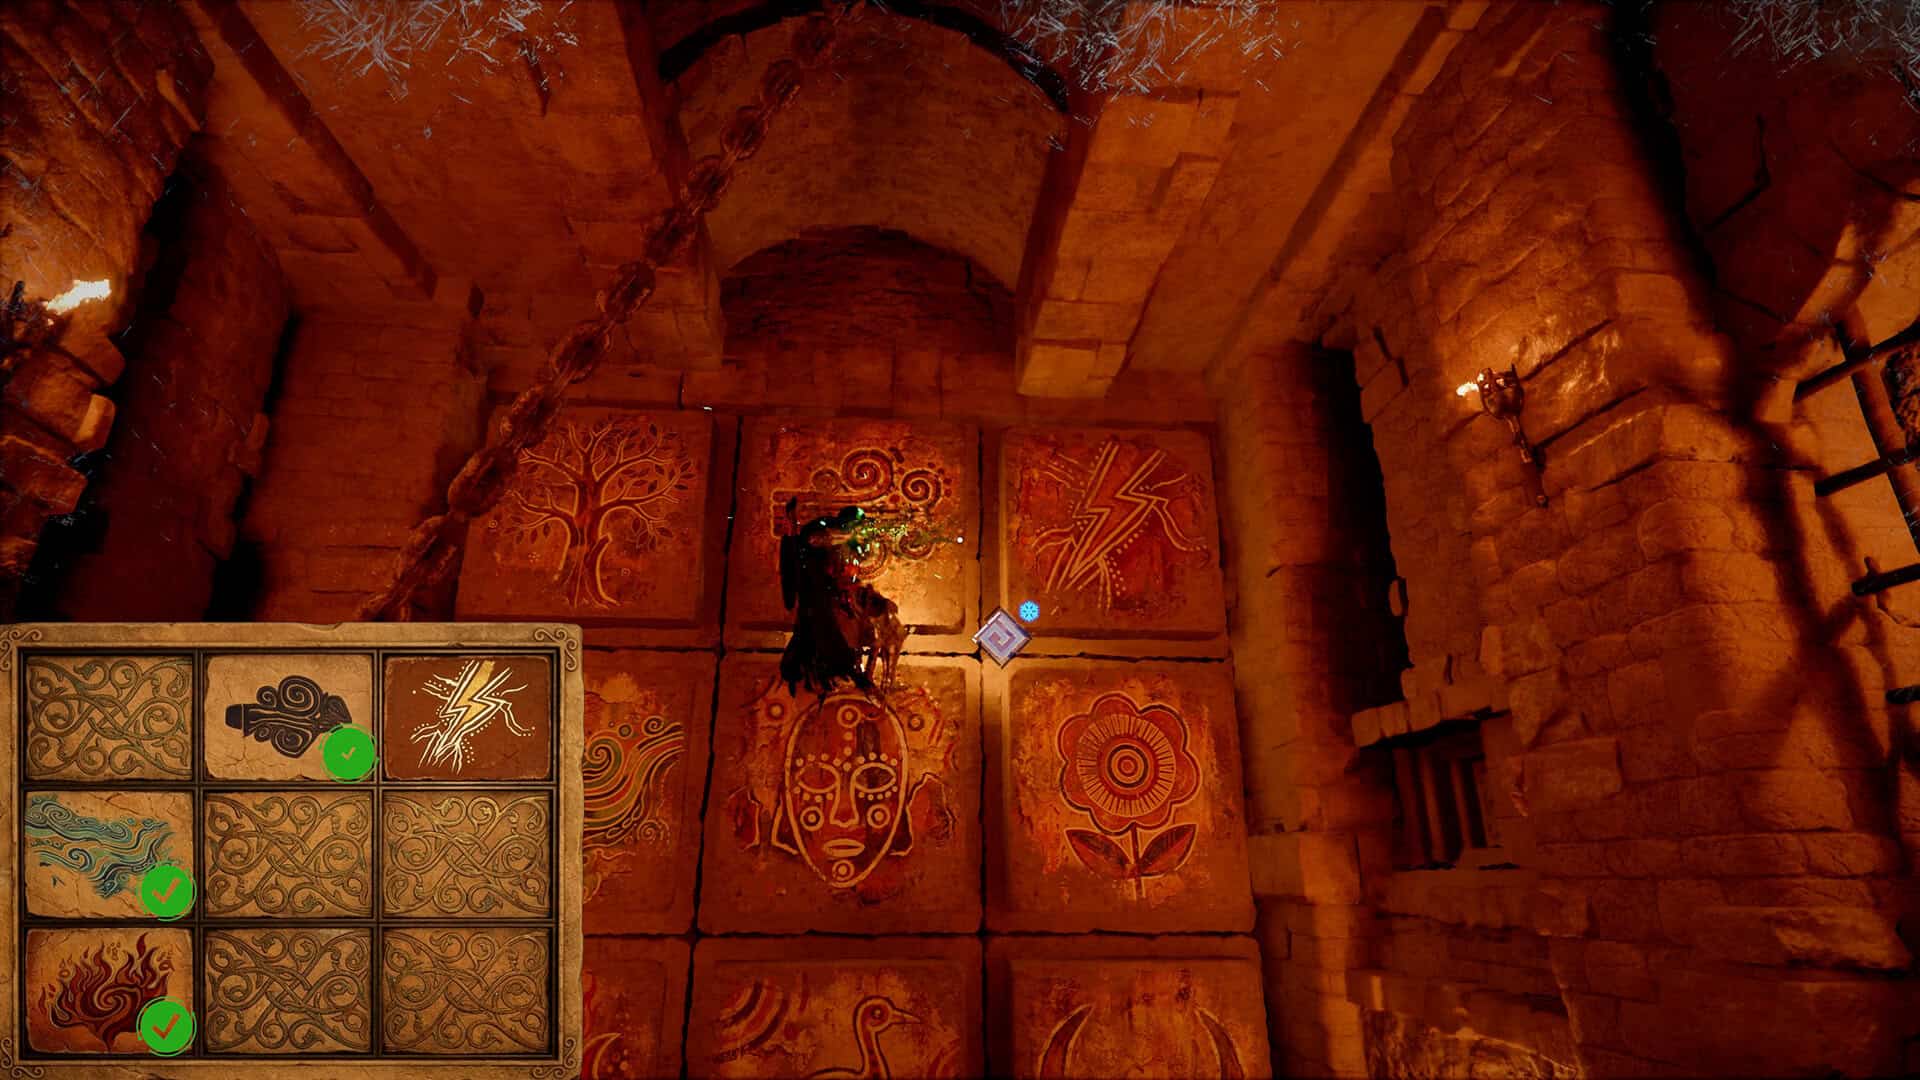
How to Press the Hidden Chamber of Wisdom Puzzle Panels
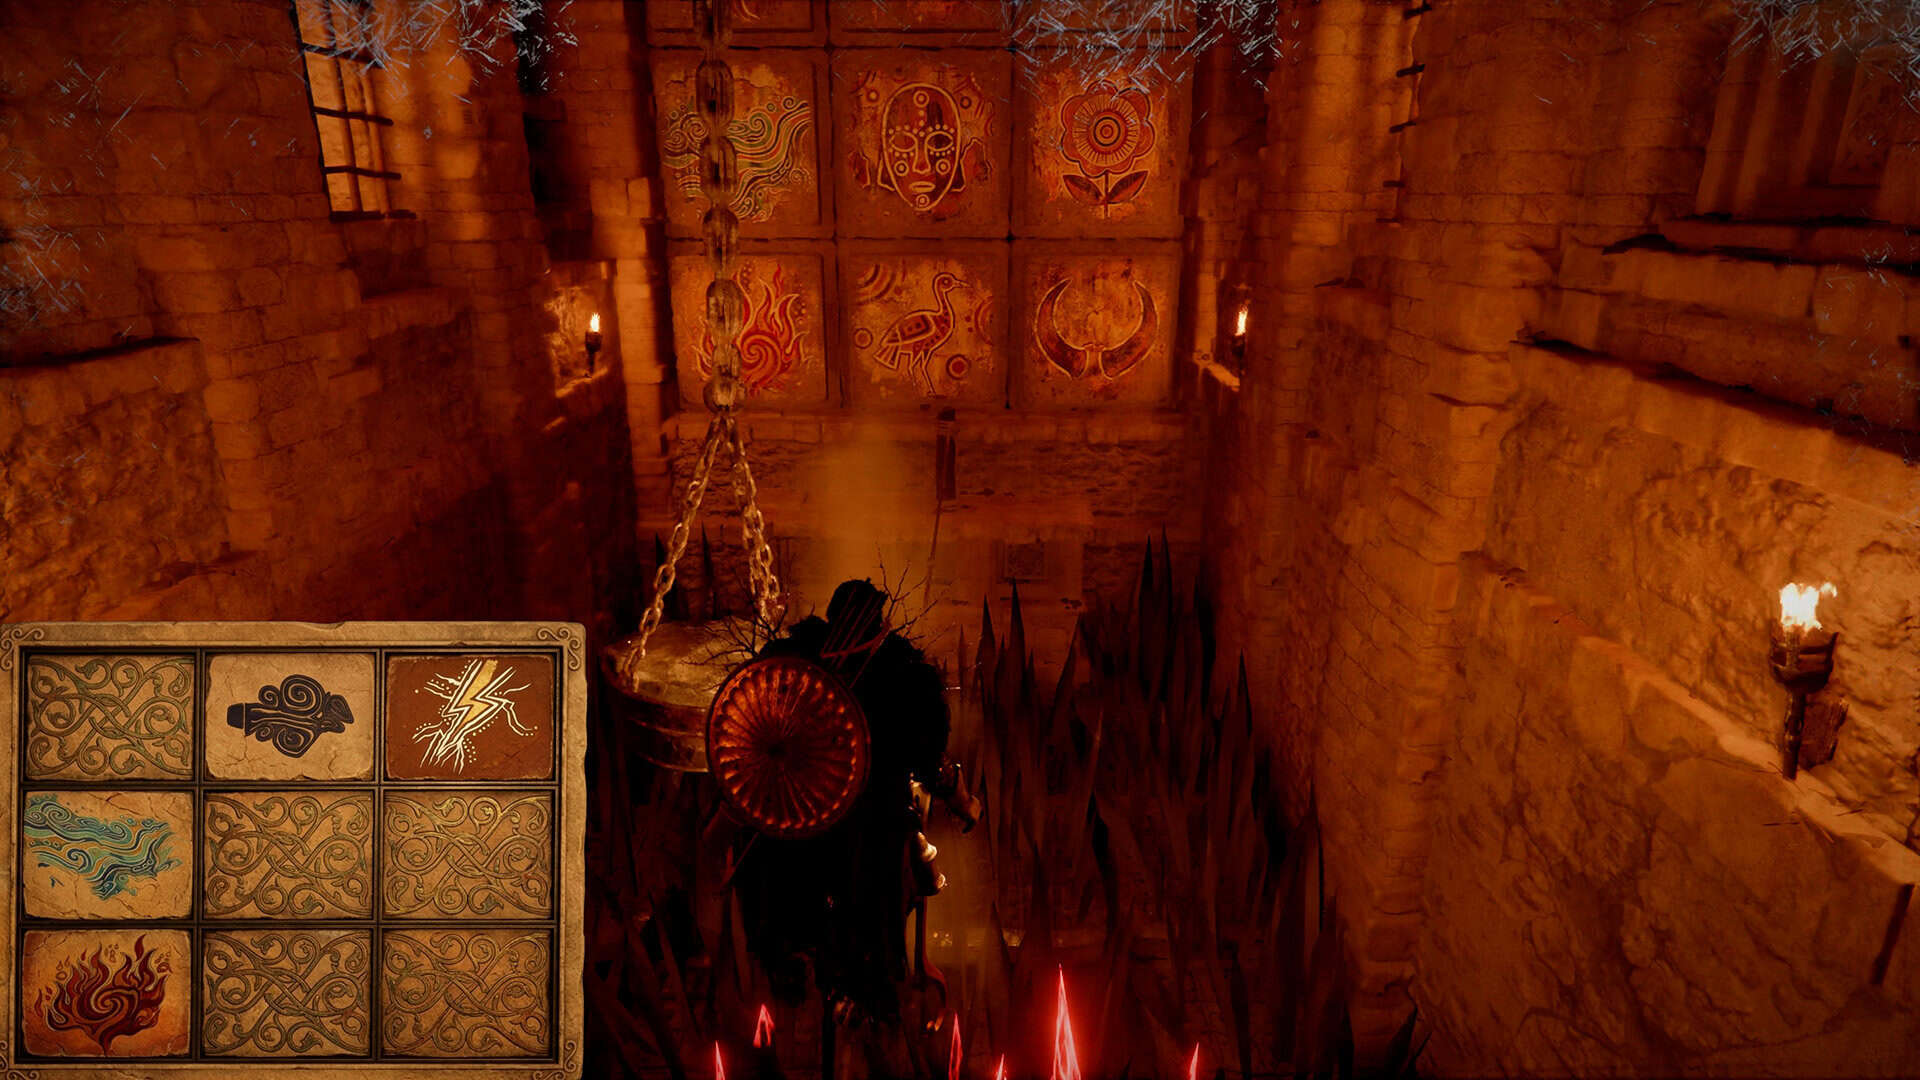
Once you are across and you reach the puzzle room, you will see a set of tiles on the walls around you. Your job is to activate the four correct ones, the panels representing wind, lightning, water, and fire. The order in which you press them does not matter at all, so you can work through them however feels comfortable to you.
The first panel is at the bottom left of the room and you can press it simply by standing in front of it and using Force Palm. Easy. For the panels higher up on the walls, you will need to climb and grab onto the wall before you can reach them. While you are hanging there, a hint menu will appear in the bottom right corner of your screen to help guide you.
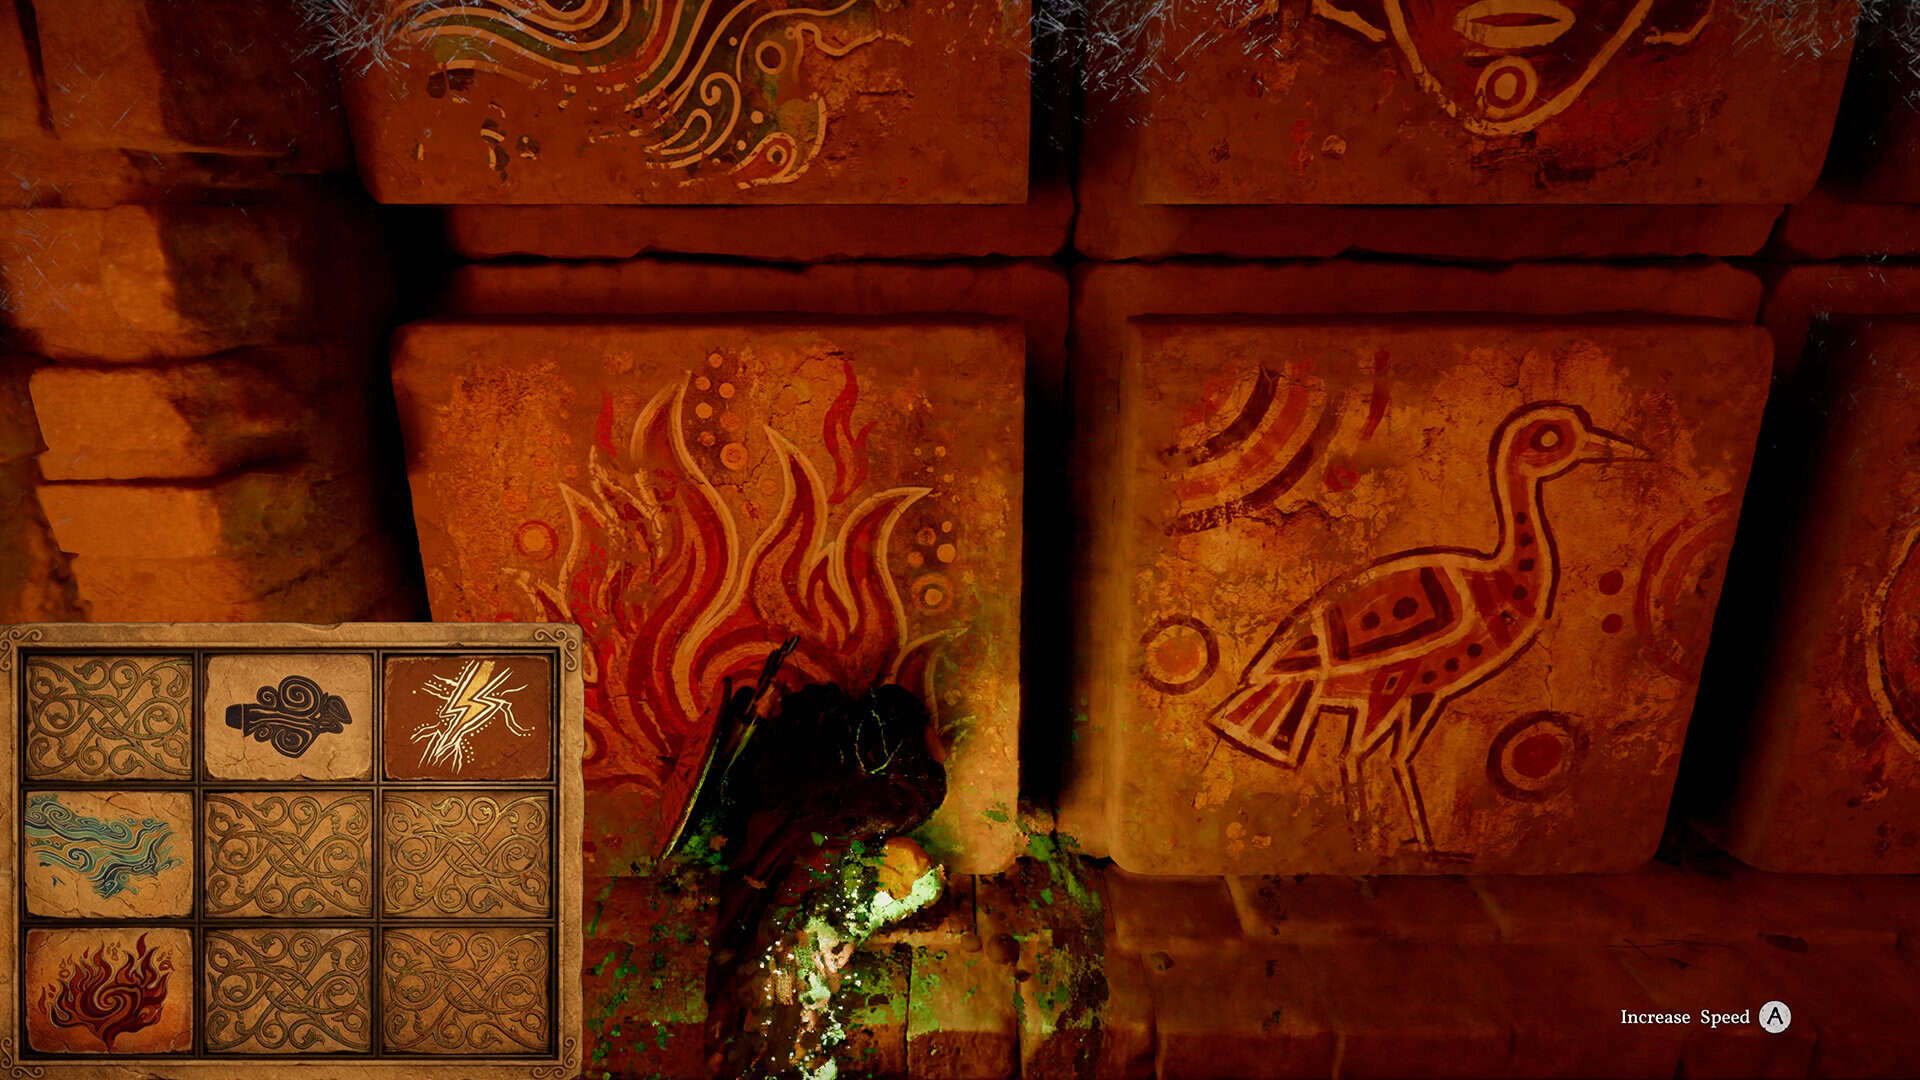
Use Force Palm to strike the panel. Here is the very important part: you must hold onto the wall right after the impact. Force Palm pushes you back hard, and if you let go at that moment, the recoil will send you off the wall and into the chasm below. So grip the wall, absorb the impact, then move on to the next one.
Keep a close eye on your stamina bar throughout all of this. Climbing and holding yourself on the wall both drain stamina, and running out at the wrong moment means losing your grip. If you are running low, stamina recovery items will save you a lot of frustration here. Also worth knowing: you can use Force Palm up to three times in mid-air while scaling a wall, which lets you reach higher panels faster and without burning through all your stamina just getting into position. Once you have pressed all four correct panels, the secret door will open and the reward is waiting for you inside.
-
- Watch Out for the Hanging Lamps
-
- Press the Hidden Chamber of Wisdom Puzzle Panels
Hidden Chamber of Wisdom Rewards: Abyss Artifact, Fast Travel, and Memories of the Northern Wind
Inside the secret room you will find an Abyss Cresset. Interact with it and you will receive your Abyss Artifact and activate a fast travel point at this location, which is very handy to have in the Silver Wolf Mountain area. You will also pick up an item called Memories of the Northern Wind, which opens up some hidden location information on your map. Take a look at what it reveals once you are back outside.
As for the Abyss Artifact itself, it is one of the most important resources in Crimson Desert. Each artifact equals one skill point, which you can spend directly through your Skills menu to unlock a new ability or strengthen an existing stat node.
Artifacts are also required for Equipment Refinement once you push any piece of gear to Refinement +5 or higher, so every single one you collect feeds directly into your character’s long-term growth. This one from the Hidden Chamber of Wisdom is essentially a free skill point, and it takes maybe ten to fifteen minutes to grab if you know what to do.
If you want to get more out of Force Palm now that you have seen what it can do, take a look at our guide to beating the Antumbra’s Staff boss in Crimson Desert, where we cover how to build around this ability for serious damage output. See you in the next guide, and take care.
-
- Secure yourself to the wall so you don’t fly away
-
- As a reward, you’ll receive the Abyss Artifact