The Dragon’s Stone Chamber puzzle in Crimson Desert is one of those moments where the game gives you almost no hint and just lets you figure it out on your own. Three circular elements sit in the middle of the chamber, each one able to rotate into different positions – and nothing in that room tells you where any of them is supposed to land. Most players either brute-force every combination until something clicks, or they walk out and come back later hoping it makes more sense. It doesn’t, unless you know where to look.
I’ll walk you through the full Dragon’s Stone Chamber puzzle solution here: where to find it, what you’re working with, the step-by-step method, and the quick shortcut that makes the whole thing take under two minutes. The answer has been sitting on the rocks outside the ruins the whole time – and I’ll show you exactly what to do.
Bookmark this guide and keep it open while you’re playing.
Where to Find the Dragon’s Stone Chamber Ruins in Crimson Desert
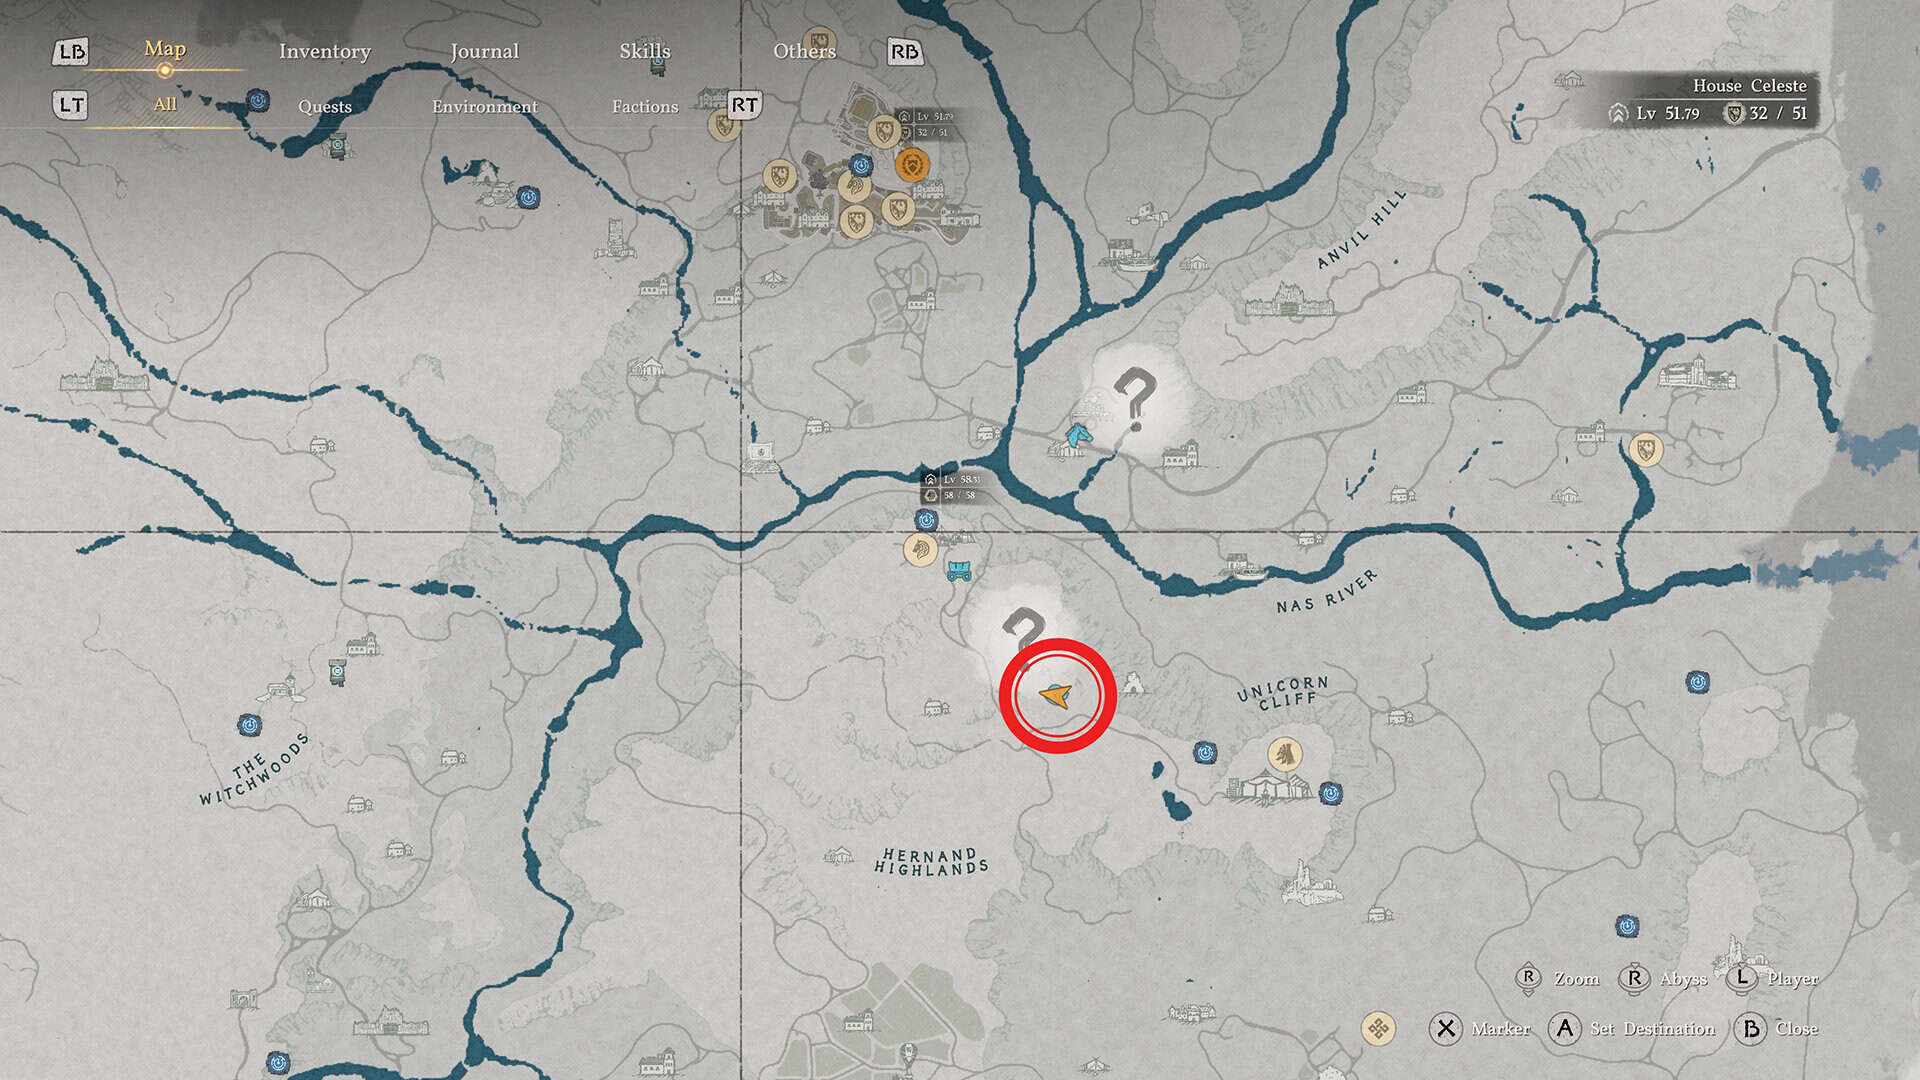
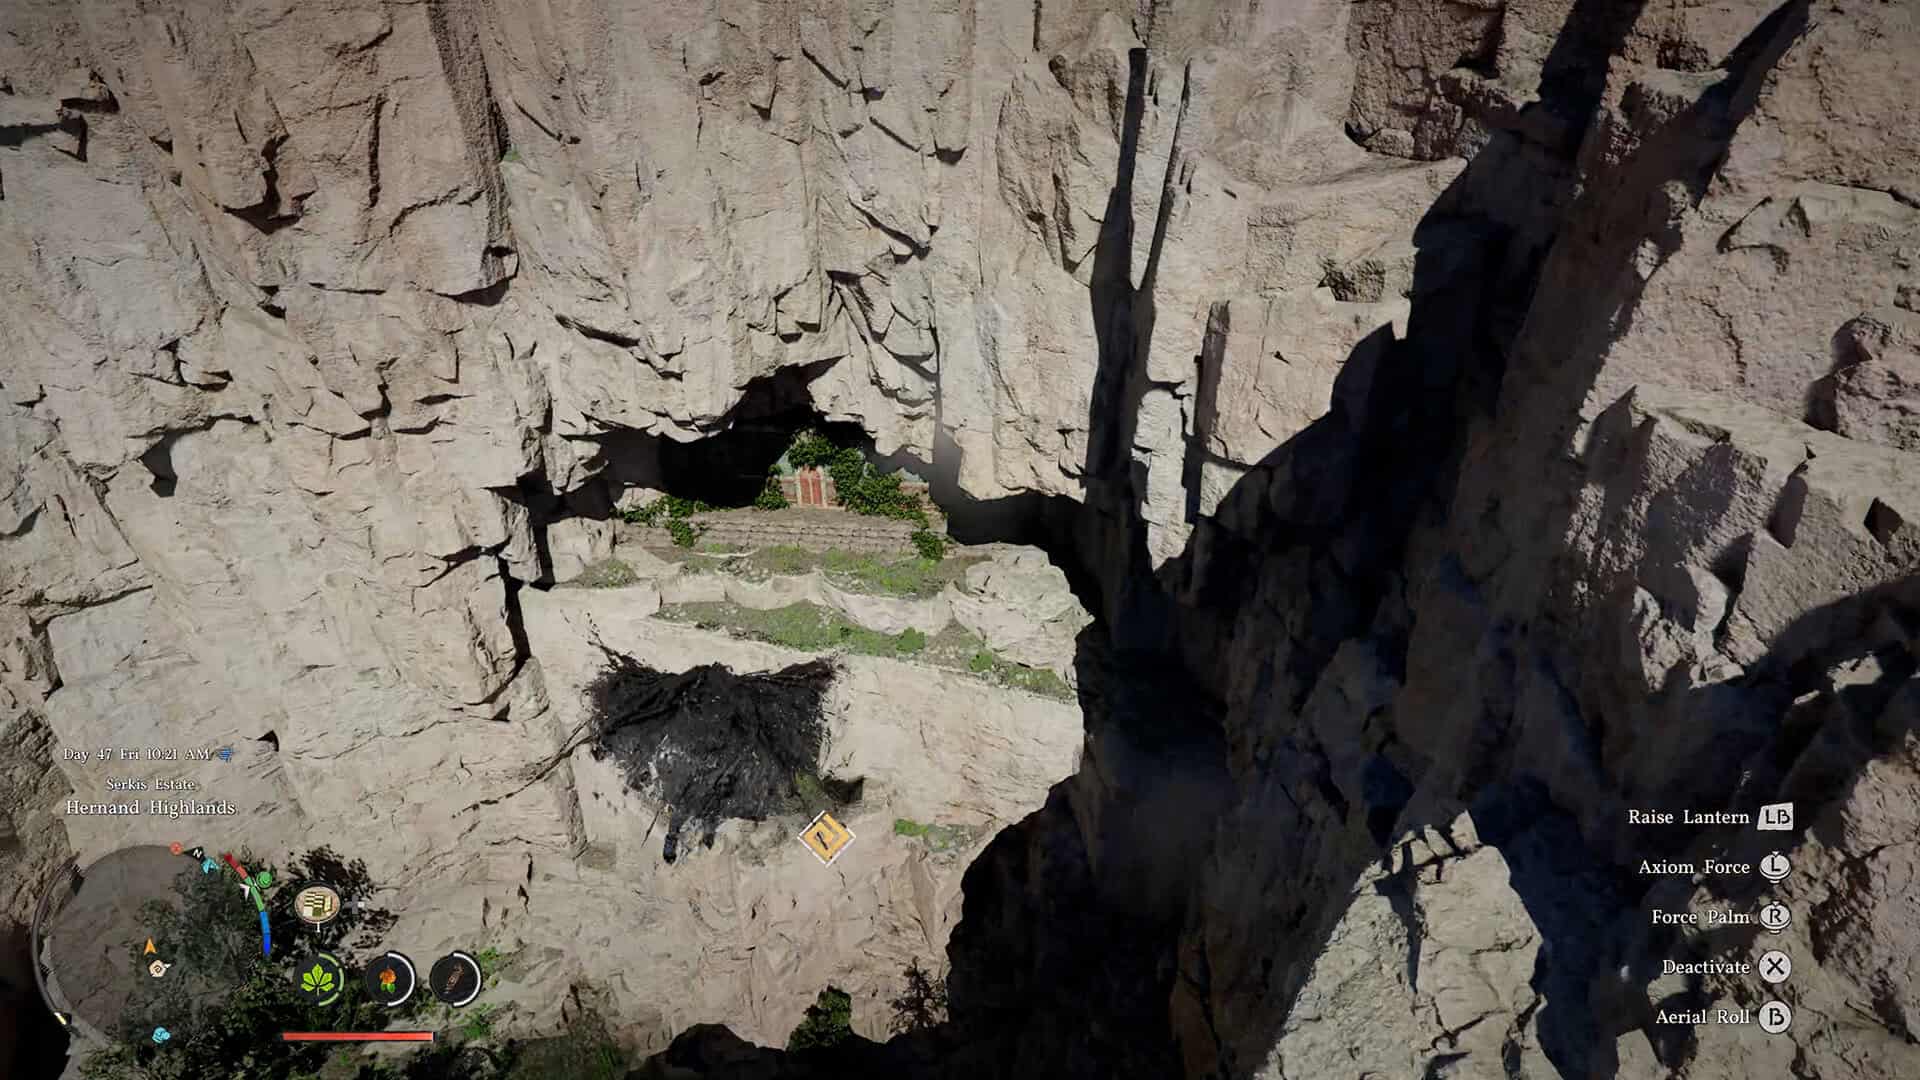
The Dragon’s Stone Chamber ruins are tucked into one of the older stone areas of the map. Once you’re in the right region, the structure stands out – there’s a distinctive stone archway at the entrance, and the area around it is noticeably quieter than the enemy zones nearby. That said, it’s easy to miss if you’re following the main questline without exploring the edges of the path.
I’ve marked the location on the map in the video, so you can reference it there if you need a visual anchor. If you’re navigating on foot, head from the nearest settlement and keep an eye out for the stone arch as you move through the ruins network in that area. The Dragon’s Stone Chamber is set slightly off the beaten path – exactly the kind of place Crimson Desert wants you to stumble across.
Before heading inside, clear the surrounding area. There are usually a few wandering enemies near the entrance – nothing too dangerous, but you don’t want them interrupting you while you’re working through the puzzle. Once the area is clean, head in.
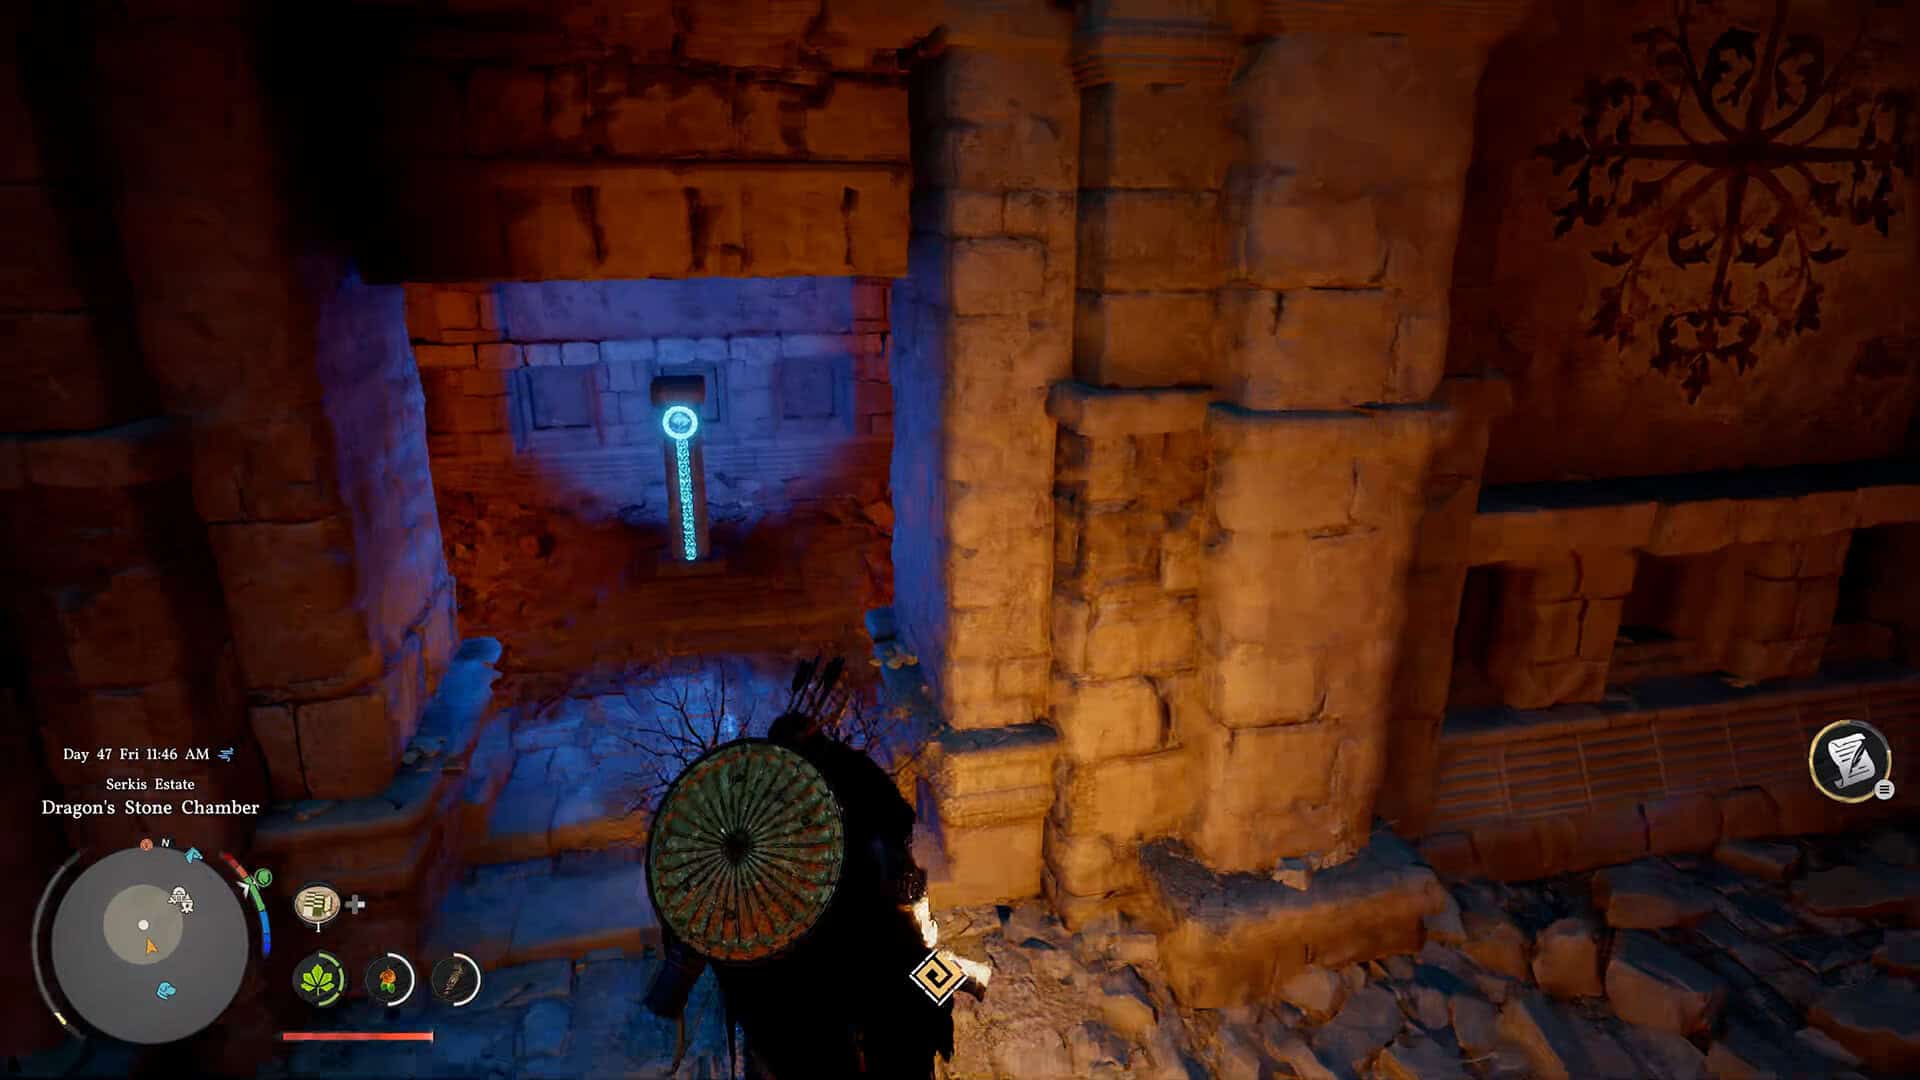
The chamber itself is a single large room. In the center, you’ll see a stone platform with three circular carved elements. Around the walls, you’ll notice markings and carvings that look like decoration at first glance. They’re not. Pay attention to them – they matter more than anything else in that room, and I’ll explain why below.
Understanding the Dragon’s Stone Chamber Puzzle
Here’s what you’re working with. Three circular stone discs are set into the central platform, each one able to rotate into different positions. Each disc has symbols carved into its face, and each one needs to land on a specific orientation. Once all three are aligned correctly at the same time, the mechanism activates and the puzzle is done.
The good news is that rotating one disc doesn’t affect the others. Once you get one locked in, you only have to worry about the remaining two. That makes this far more manageable than the puzzles where everything shifts when you touch it.
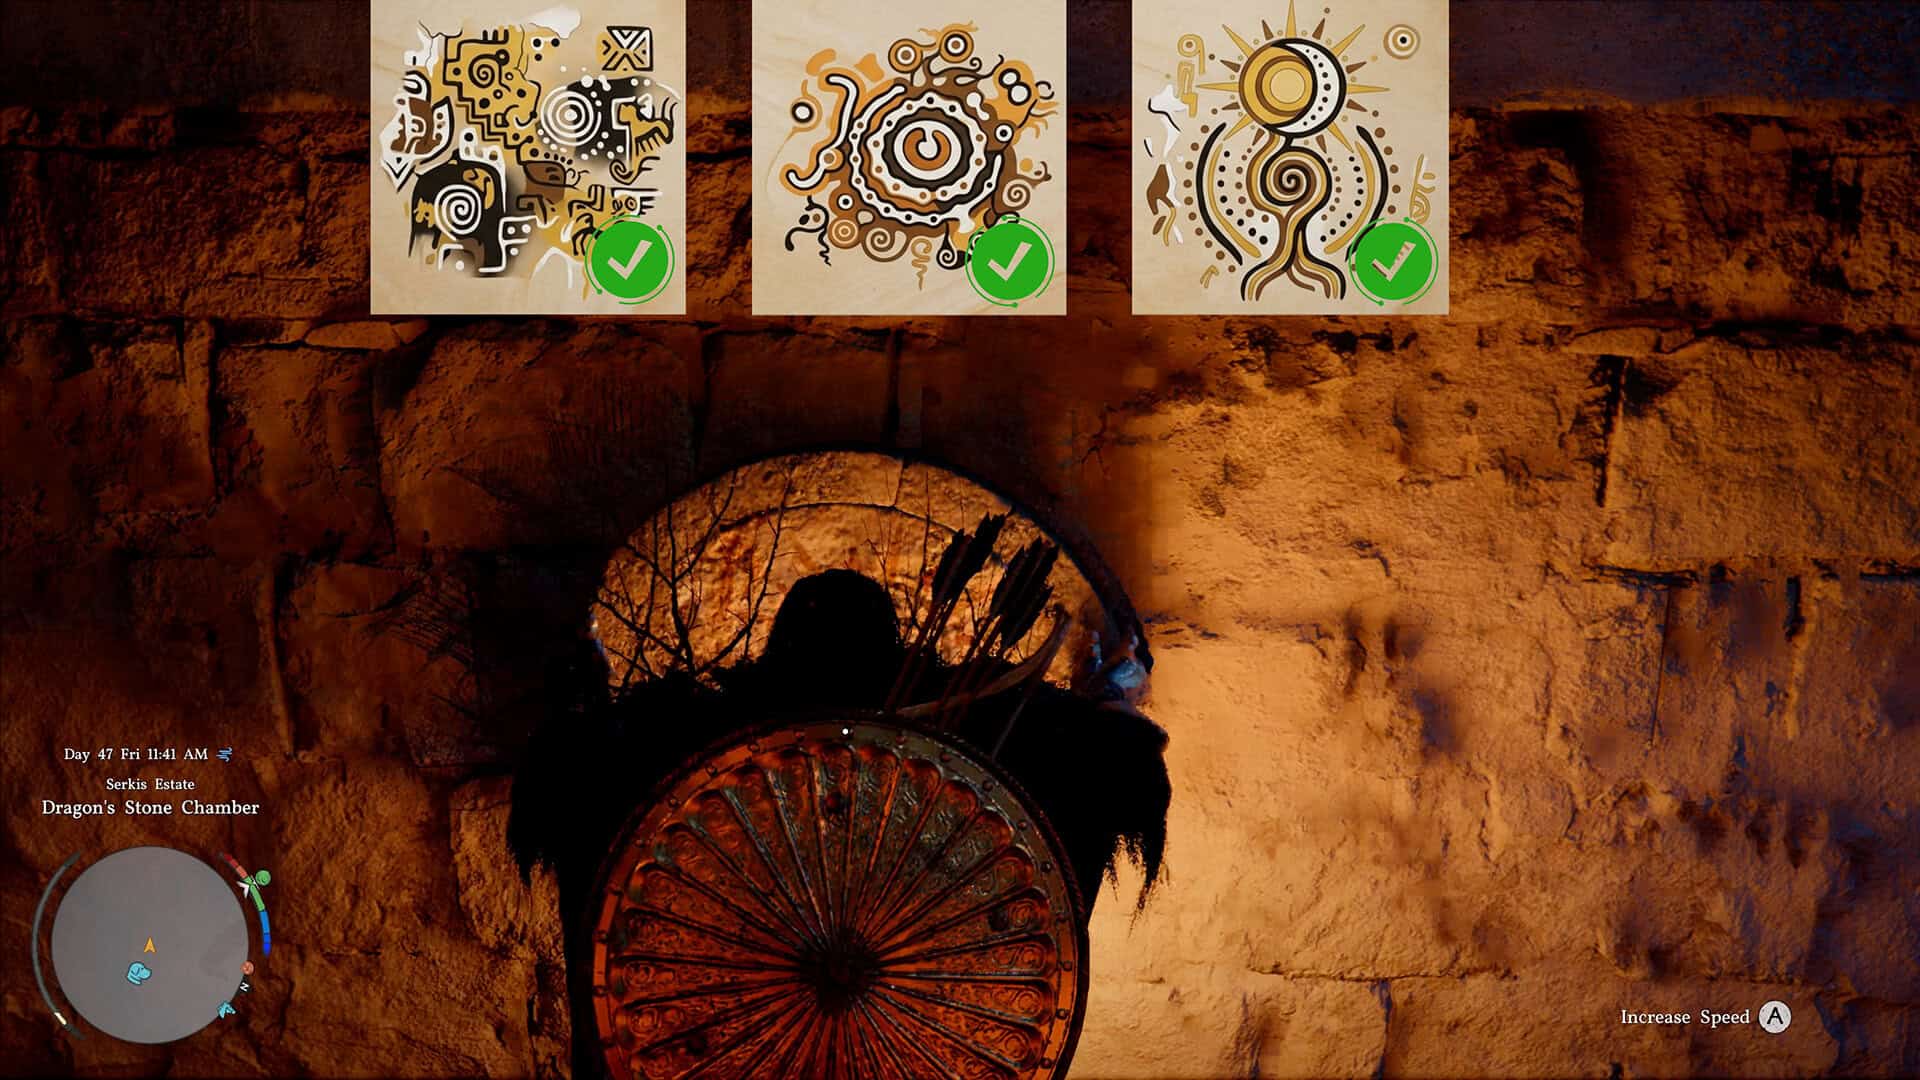
What the game doesn’t tell you — and this is where most players waste a lot of time – is that the correct position for each disc is already shown to you before you ever touch anything. Around the Dragon’s Stone Chamber ruins, there are specific points marked on the map. At each of those points, there’s a rock with a carved marking on it. Each marking shows you exactly where the corresponding circular element inside the chamber needs to be rotated to.
Without those markings, you’re guessing. With them, you walk in, set each disc, and walk out with the reward in under two minutes. I’ll show you the exact method in the next section.
-

- Where to Find the Dragon’s Stone Chamber Ruins in Crimson Desert
-
- Entrance Dragon’s Stone Chamber Puzzle
Dragon’s Stone Chamber Puzzle Solution – Step by Step
Here is the complete Dragon’s Stone Chamber solution in the order that works every time.
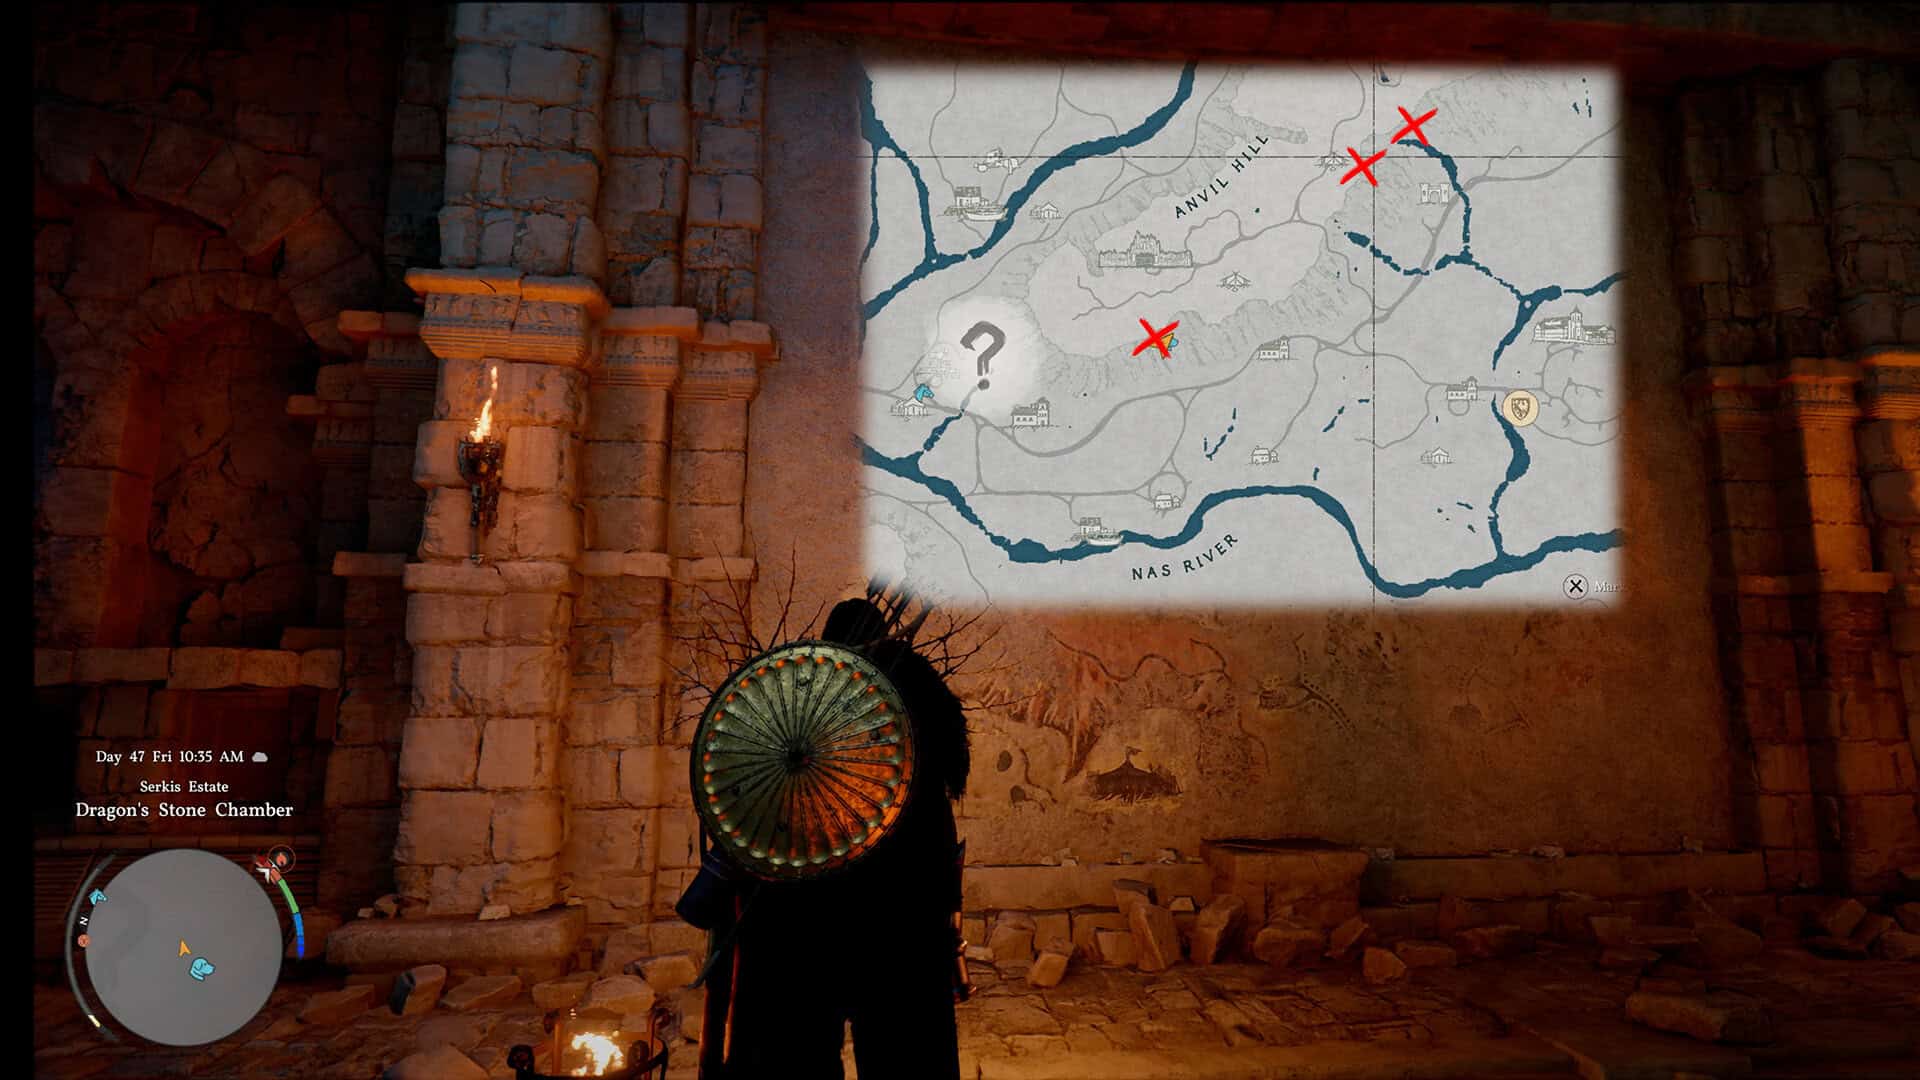
First, before you go inside the chamber, visit each of the three map-indicated points around the ruins. At each spot you’ll find a carved marking on the rocks. The shape and orientation of that marking corresponds directly to the position the matching circular element inside the chamber needs to be rotated to. There’s one marking for each of the three discs. Note what you see at each spot, or keep this guide open while you check them – it only takes a minute.
Once you have all three reference positions in mind, head into the chamber. The three discs correspond to the three markings left to right. Rotate the first disc until its symbol matches the orientation from the first marking. When it’s correct, you’ll get a subtle confirmation – a soft sound or a slight visual shift in the platform. That’s how you know it’s locked in.
Repeat for the center disc, then the right disc. Once all three are in position, the Dragon’s Stone Chamber mechanism activates on its own. The puzzle triggers automatically – you don’t need to press anything else.
If you rotate all three and nothing happens, one of them is off by a position. It’s easy to overshoot by one click. Go back to each disc individually, recheck it against its corresponding rock marking, and adjust. Once all three click into place, the chamber opens.
The Rock Markings – What Most Dragon’s Stone Chamber Guides Miss
This is the part that turns a twenty-minute frustration session into a two-minute solve, and it’s the detail almost no walkthrough bothers to explain.
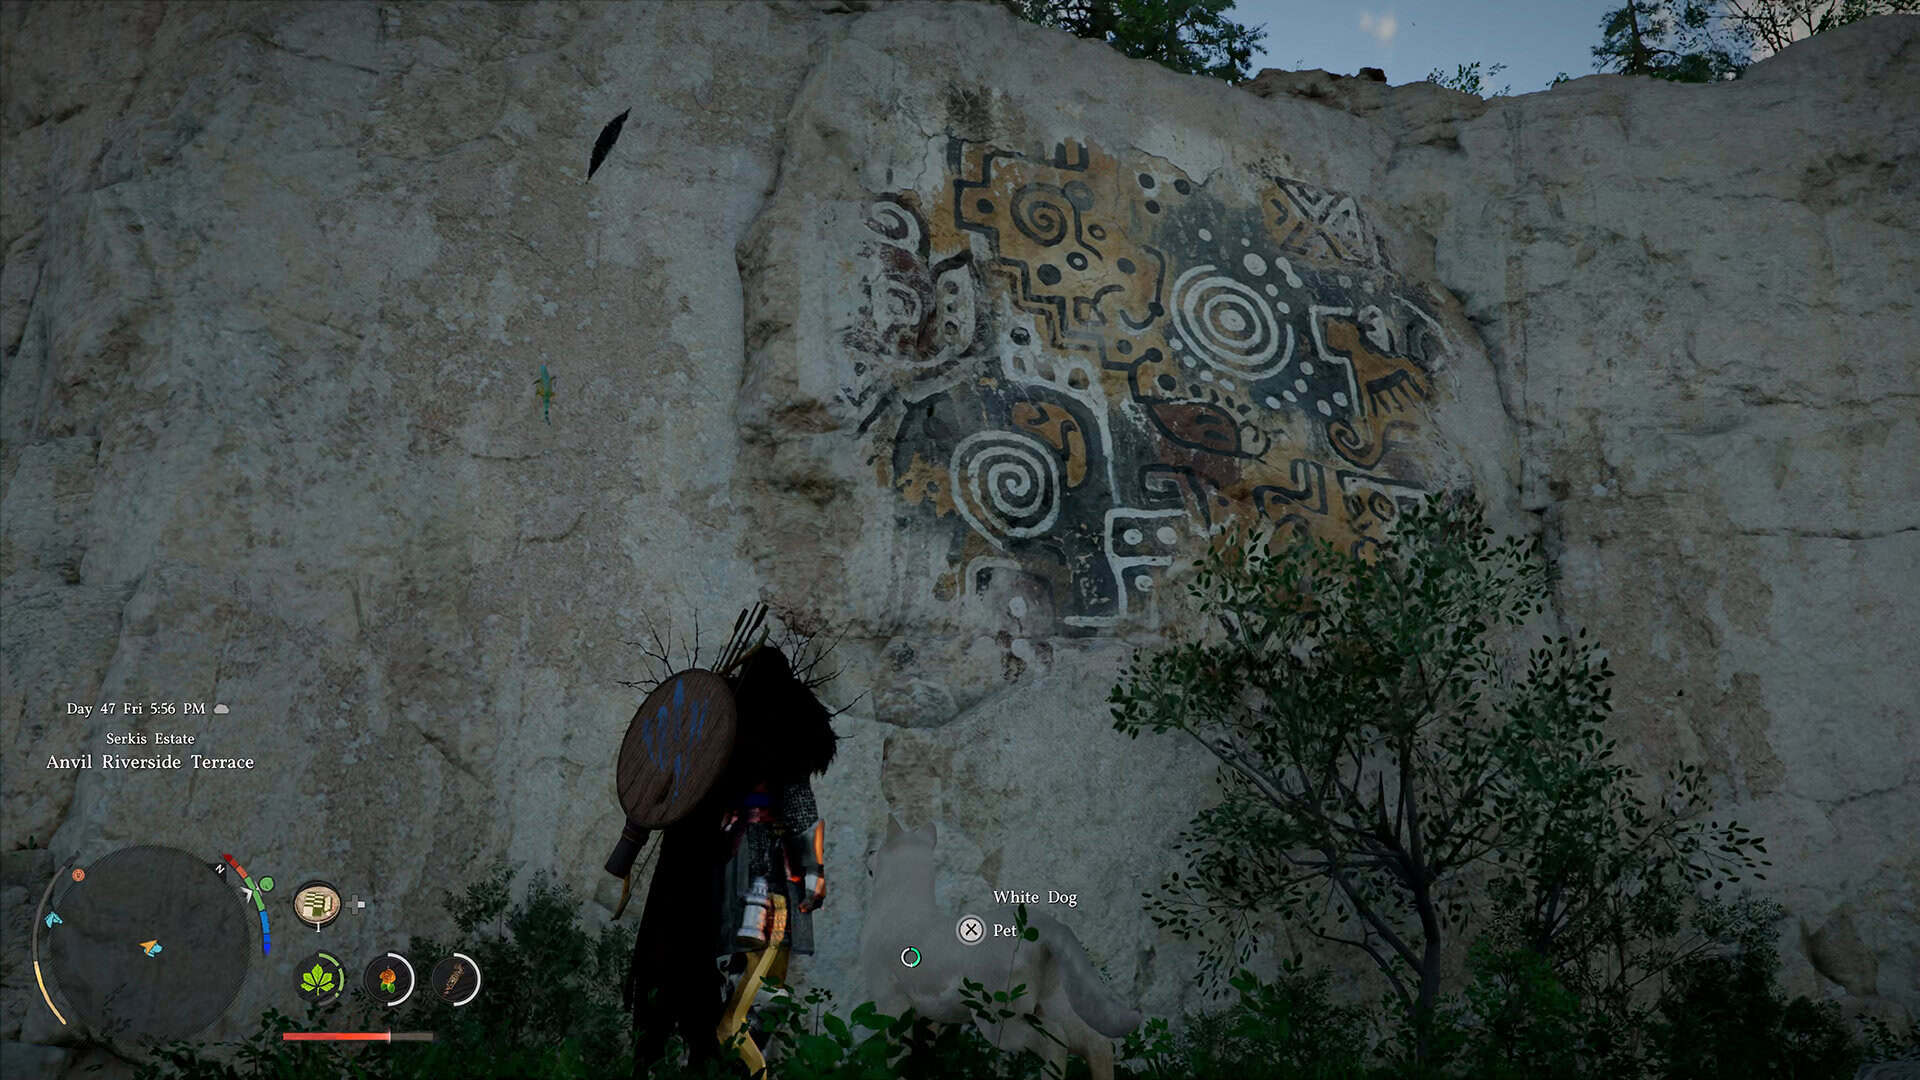
The key to the Dragon’s Stone Chamber puzzle is that the correct positions for all three circular elements are already shown to you outside the ruins – before you set foot inside. Around the chamber, the map marks three specific points. At each one, you’ll find a rock with a carved marking on it. Each marking shows the exact orientation that the corresponding disc inside the chamber needs to land on. One marking per disc, three spots total.
The markings look like decorative stonework at first. They blend into the ruins scenery, and most players walk straight past them heading toward the chamber entrance. That’s exactly why this puzzle frustrates so many people – the answer is sitting right there in plain sight, but it doesn’t announce itself.
Here’s a little tip: visit all three marking spots before you touch anything inside. You can check them in any order. At each one, just note the position of the carving. Then, inside the chamber, match each disc to its marking – left disc to the first spot, center disc to the second, right disc to the third. The match is direct and clear once you know what you’re looking for.
Once you know this, the Dragon’s Stone Chamber secret becomes obvious. Crimson Desert hides puzzle answers like this throughout the game – the hints are always there. You just have to look in the right places before you start touching things.
-
- Dragon’s Stone Chamber Puzzle Solution — Step by Step
-
- The Rock Markings — What Most Dragon’s Stone Chamber Guides Miss
What You Get for Completing the Dragon’s Stone Chamber
Once all three discs lock in and the mechanism fires, a compartment opens at the base of the platform and the reward becomes available. What you get scales with your current progression, but the Dragon’s Stone Chamber reward is genuinely worth the effort – typically a combination of gear and materials that are useful at the stage of the game where you’re likely to find this puzzle.
Before you move on, take a moment to check the area around the chamber as well. Environmental puzzles in Crimson Desert often have a secondary item or two nearby that players miss because they grab the main reward and walk out immediately. Spend a few extra seconds looking around before you leave.
This is also one of those locations worth coming back to on a second playthrough. Once you know where the rock markings are, the whole thing clicks in a satisfying way – it’s a well-constructed puzzle that rewards attention to the environment over brute force. If you enjoyed it, there are several more ruins puzzles scattered through Crimson Desert built on the same logic.
-
- All the images you need in one place
-
- What You Get for Completing
Dragon’s Stone Chamber Puzzle – FAQ
How do you solve the Dragon’s Stone Chamber puzzle in Crimson Desert?
Place all three circular elements in the correct positions. The correct position for each one is shown by a carved marking on the rocks at the three map-indicated points surrounding the ruins. Check all three markings before going inside, then rotate each disc to match its corresponding marking. Once all three are aligned, the mechanism activates automatically.
Where are the rock markings for the Dragon’s Stone Chamber puzzle?
At the three points marked on the map around the Dragon’s Stone Chamber ruins. The markings look like decorative carvings on the rocks – easy to miss on the way to the entrance if you’re not specifically looking for them. Check all three spots before you enter the chamber.
Can you solve the Dragon’s Stone Chamber without using the rock markings?
Technically yes – you can rotate each disc through all its positions until the puzzle triggers. But there are enough possible positions that this takes a while and involves a lot of guessing. The markings give you the exact answer immediately. It’s worth the sixty seconds to check them first.
What’s the reward for the Dragon’s Stone Chamber puzzle?
The chamber opens and a compartment appears at the base of the platform. The reward includes gear and crafting materials scaled to your progression. Check the compartment and also look around the immediate area afterward for any secondary items nearby.
Is the Dragon’s Stone Chamber part of the main story in Crimson Desert?
No – it’s an optional environmental puzzle in the ruins area. You don’t need it to progress the main questline, but it’s worth completing for the reward and the experience. If you’re going for full area exploration, it’s one of the puzzles you’ll want to tick off.
If you’re working through the Crimson Desert puzzle content, these guides will save you time:
- Crimson Desert – Toward the Nest Walkthrough, Puzzle Solution and Crowcaller Guide
- Crimson Desert – Cleanse All 4 Sanctums from Tanya (Temperance, Penitence, Benediction, Absolution)
- Trembling Woods Puzzle Solution in Crimson Desert
Check out our other guides on ingametor.com for more Crimson Desert walkthroughs, boss fights, and puzzle solutions.