The Trembling Woods Puzzle in Crimson Desert is one of the ancient ruins puzzles that catches players out not because the solution is complicated, but because one of the three levers behaves completely differently from the other two. The right and center levers work through a normal grip interaction. The left lever does not respond to gripping at all, and if you don’t already know that you need the Stab skill to activate it, you can stand there cycling through every input you have and get nowhere. This guide gives you the full solution in the correct order, explains exactly how to handle that left lever, and covers what you unlock once the puzzle is complete.
The Trembling Woods Ancient Ruins are one of 37 ancient ruins puzzles spread across Crimson Desert, and each one follows the same reward structure: solve the puzzle, drop into a secret room, and collect an Abyss Artifact. If you’re working through the full set, our Hunter’s Cabin Ancient Ruins guide covers another puzzle in the Hernand region that also rewards an Abyss Artifact and hides a treasure map leading to a second chest at Bursada Temple.
Trembling Woods Ancient Ruins Location in Crimson Desert
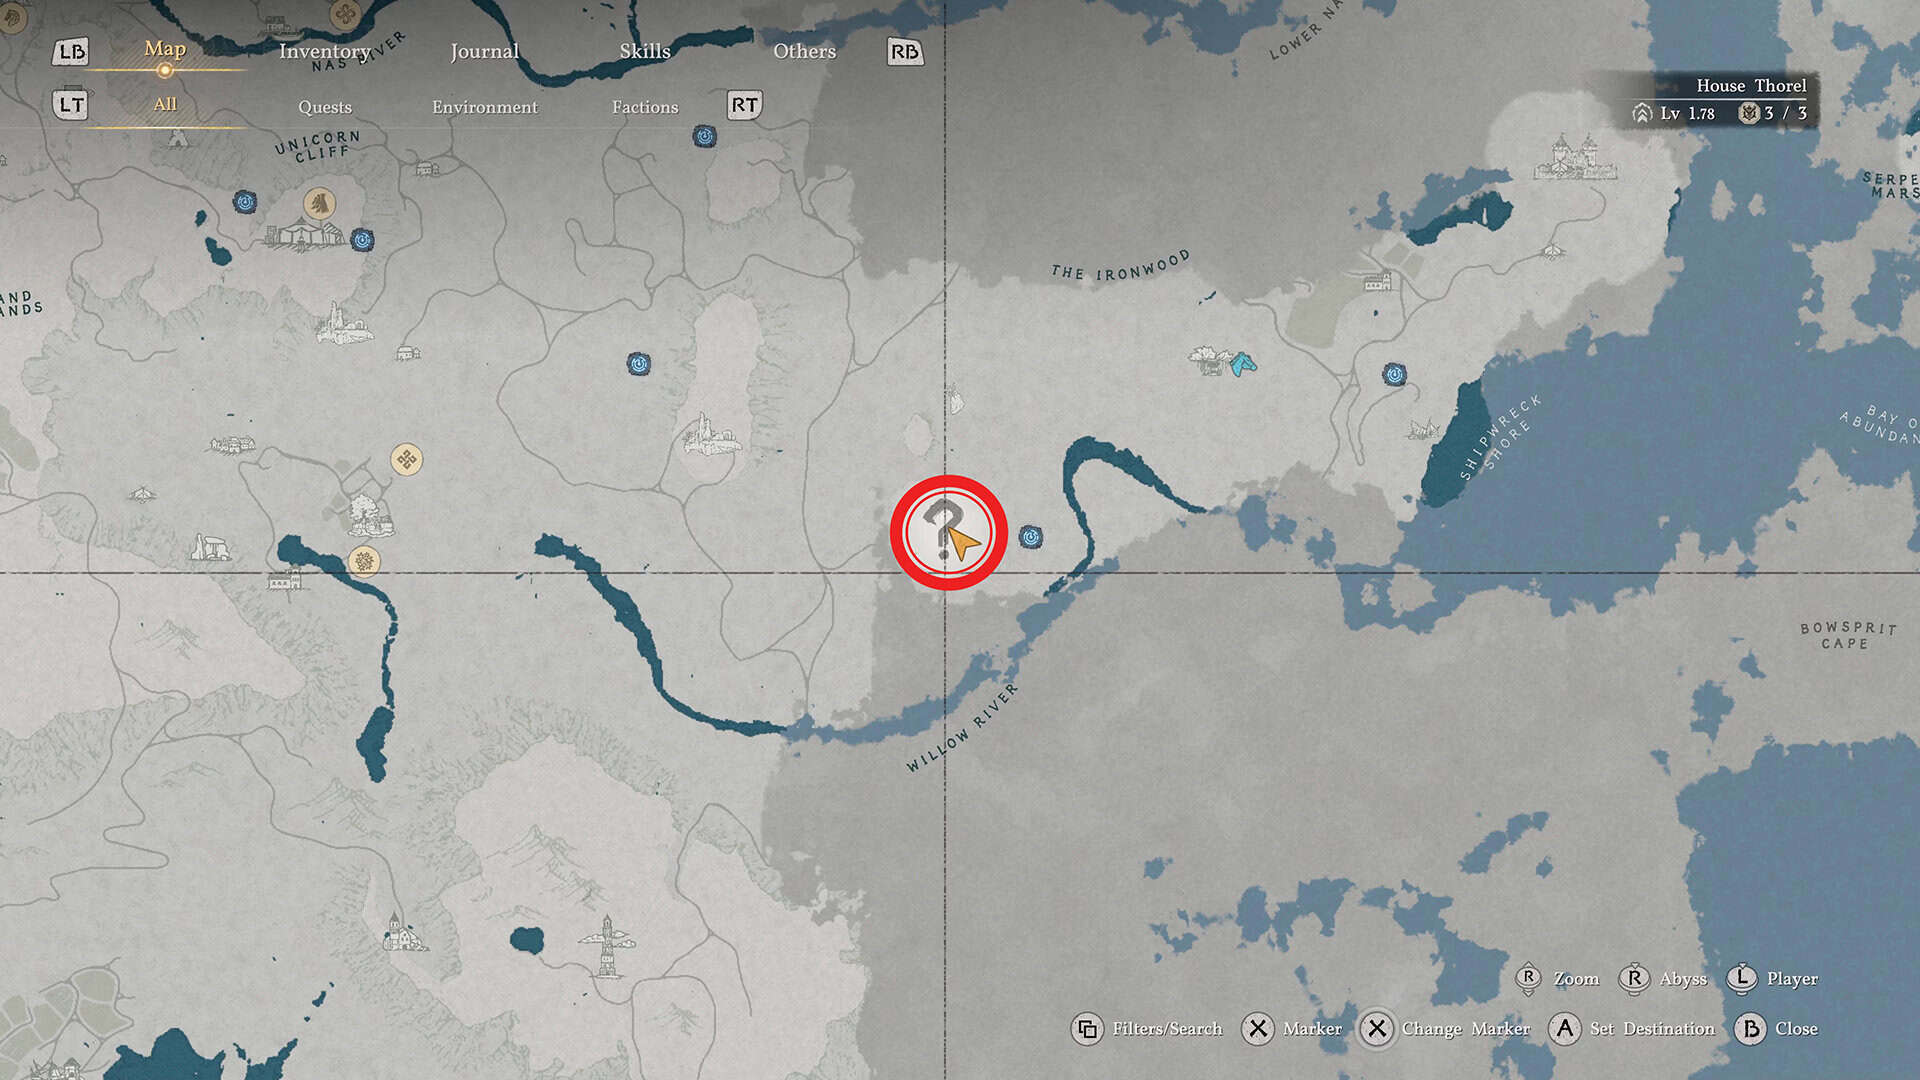
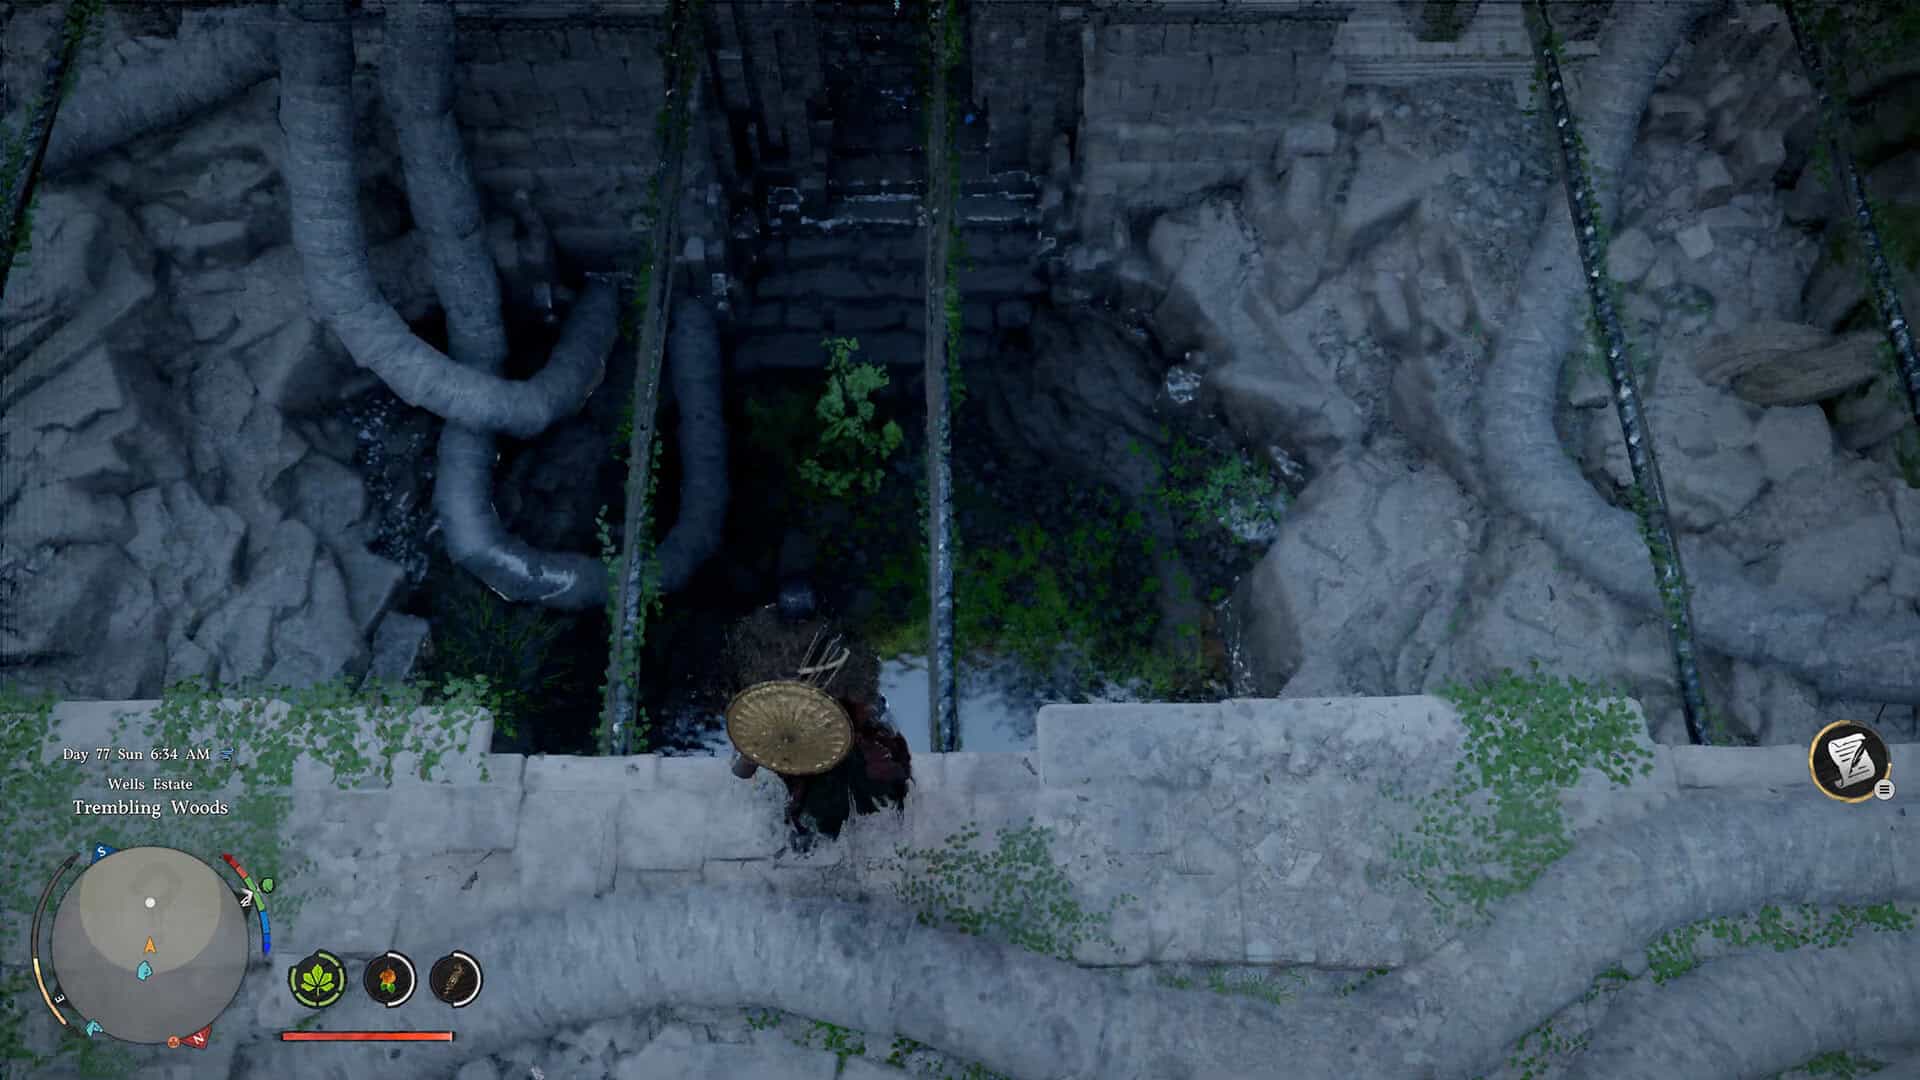
The Trembling Woods Ancient Ruins are located in the Demeniss region, in the Wells Estate area southeast of a landmark called Galleypulley. The site sits close to the southern edge of Demeniss, near the border where the region meets Hernand, so if you’ve been exploring the Hernand side of the map you’re already in the right general direction.
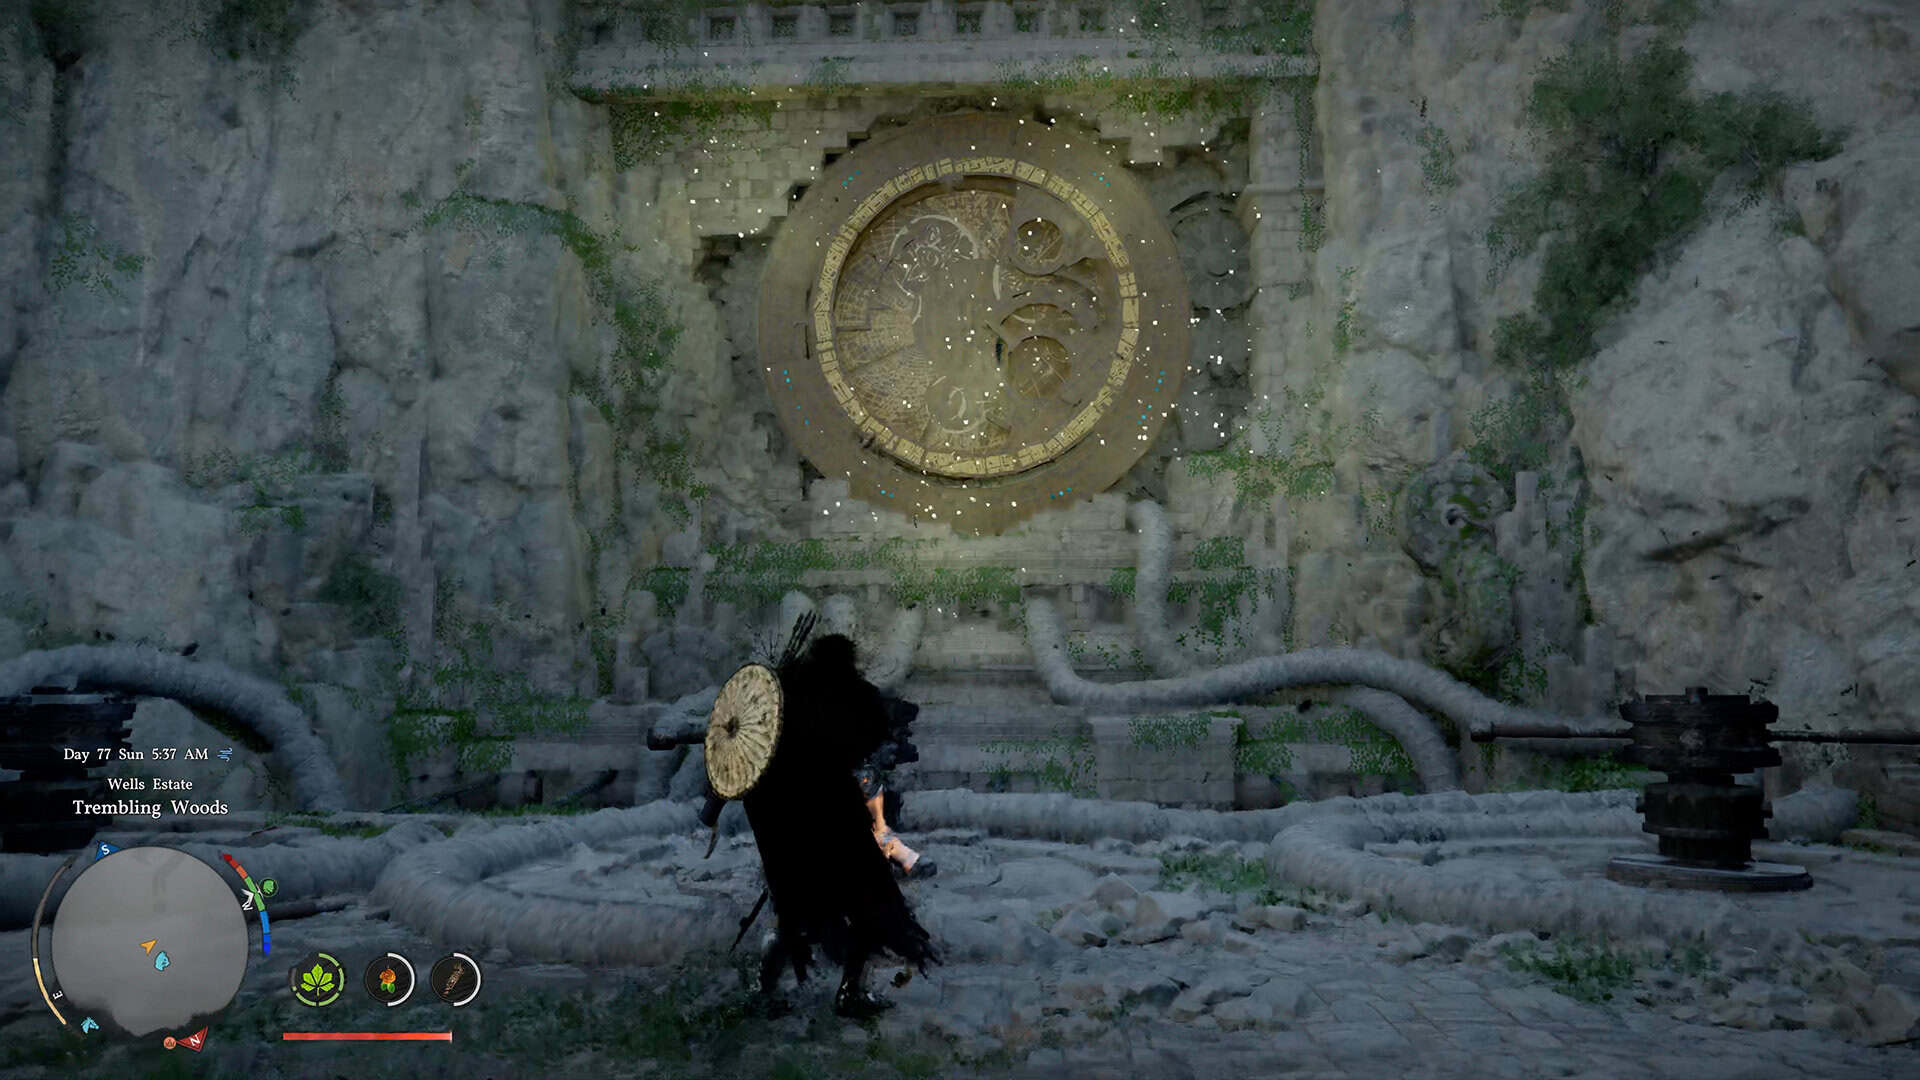
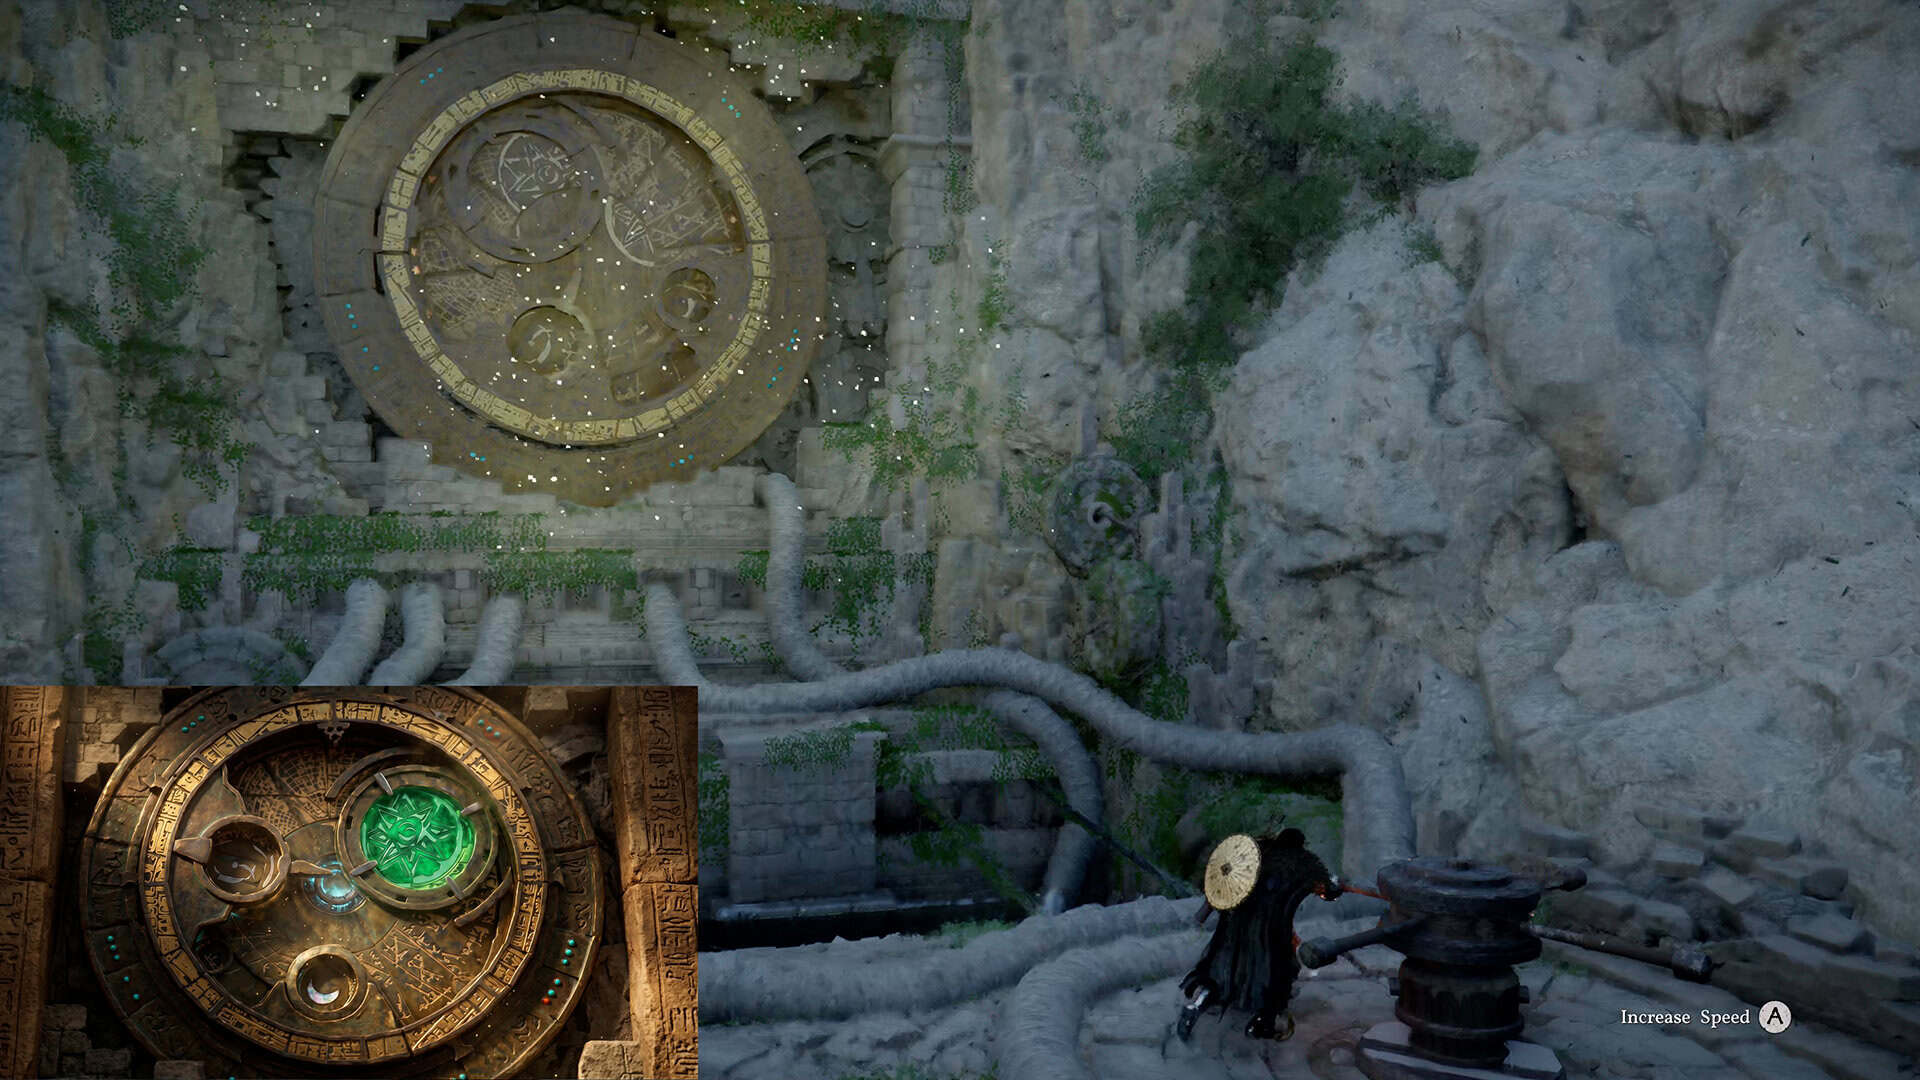
When you reach the ruins and step inside, you’ll find a large circular mechanism dominating the space in front of you. Three levers are positioned nearby, each one controlling a different component of the mechanism independently. The puzzle requires you to use each lever to rotate its corresponding part into the correct position so that everything aligns into the right final configuration. Looking at the mechanism cold, it can seem like a lot to take in, but each lever has one job and the solution plays out in a clear sequence.
The only detail that stands between you and finishing this puzzle is knowing that the third lever, the one on the far left, works on a different input than the others. The right lever and the center lever both work through a standard grip and rotate interaction. The left lever is moved using the Stab skill, and there’s no in-game prompt telling you that. That’s the piece of information this guide is here to give you before you waste time trying to make it respond to anything else.
How the Trembling Woods Puzzle Works: What Each Lever Controls
The circular mechanism at the center of the puzzle is made up of layered components that each move independently. There is a background section that forms the base pattern, a large outer ring, and two smaller rings. Your three levers each control one of these layers, and the goal is to rotate each one into the correct position so the complete image comes together.
The right lever controls the background section. Rotating it sets the underlying pattern into place, which establishes the reference positions that the rings need to align with. This is the first step, and you want to complete it before touching anything else, since this layer is the foundation the other two build on.
The center lever controls the large outer ring. Once the background is correctly positioned, you use the center lever to move this ring until it sits over the right part of the pattern behind it. This step is straightforward and takes only a few rotations to land in the right place.
The left lever controls the two smaller rings. These need to be brought into alignment with two specific positions on the background pattern. And this is the lever that requires the Stab skill. You can’t grip it and turn it the way you would the other two. Stabbing it is what makes it move, and each use shifts the position of the smaller rings incrementally.
-

- Trembling Woods Ancient Ruins Location
-
- Trembling Woods Puzzle
Trembling Woods Puzzle Solution: All Three Steps in Order
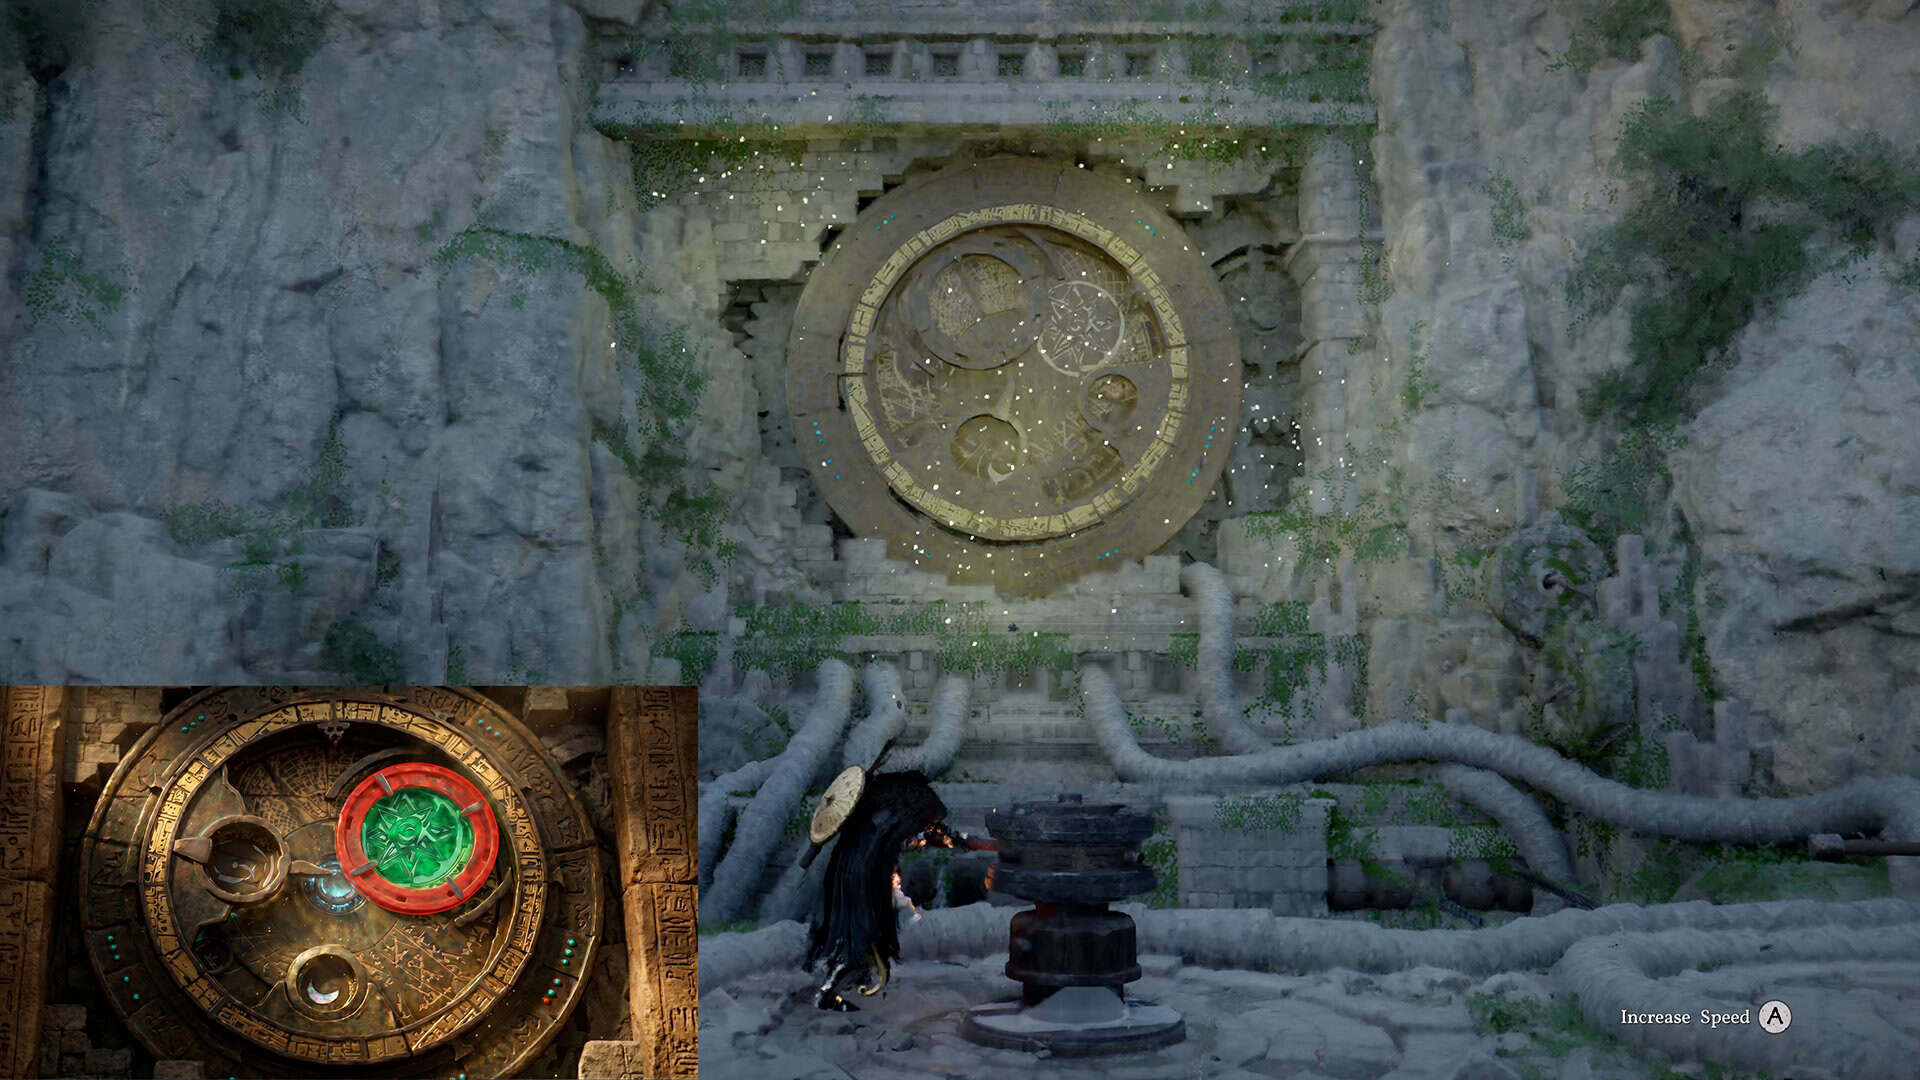
Start with the lever on the far right. Rotate it to set the background mural into its correct base position. You’re looking to create a configuration with a large symbol in the upper right section, a smaller symbol near the bottom, and a medium symbol positioned to the left. This is the arrangement the rings need to match once you place them. Once the background is aligned, don’t touch the right lever again and move to the next step.
Next, use the center lever. Rotate it to move the large ring until it sits directly over the large symbol in the upper right of the background you just set. The large ring has one clear destination here, so it shouldn’t take long to find the right position. When the ring covers the large symbol cleanly, the center lever is done.
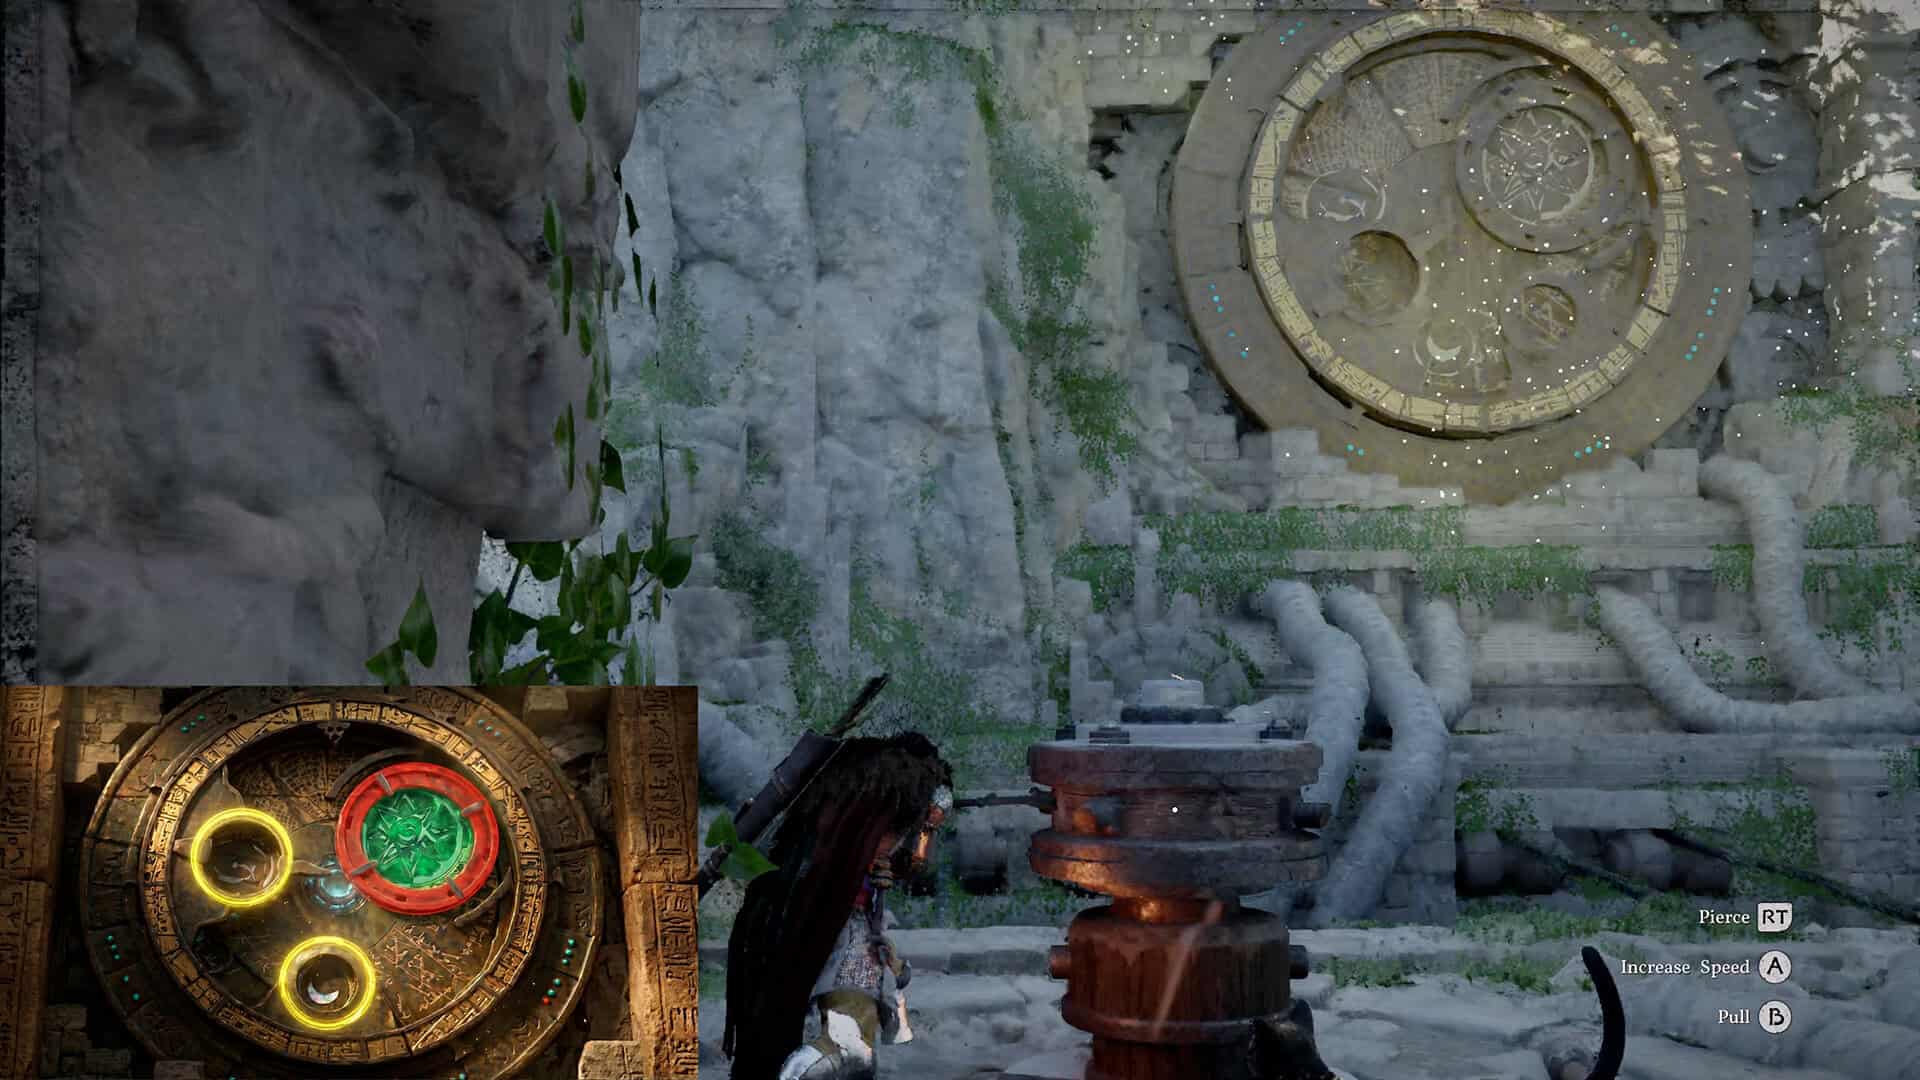
Now go to the left lever. Do not try to grip it. Use the Stab skill on it instead. Each time you activate Stab while facing this lever, it shifts the position of the two smaller rings. You need to continue using Stab and checking the alignment until both smaller rings are sitting over the remaining two symbols on the background, the smaller one near the bottom and the medium one to the left. In my experience, you’ll need to activate Stab several times and check your positioning between each input before the rings land exactly where they need to be.
When all three components are correctly aligned, a confirmation message will appear on screen telling you the puzzle is solved. The camera will then pull back to give you a wide view of the surrounding area. That wide-angle moment is not just visual flair: it’s showing you where the entrance to the secret room has opened below the mechanism. Pay attention to where the camera is pointing, because that’s exactly where you need to go next.
How to Use the Stab Skill on the Trembling Woods Puzzle Lever
The Stab skill requirement on the left lever is the single most confusing part of this puzzle, and it’s the reason so many players get stuck here. There’s no on-screen prompt, no visual indicator, and nothing about the lever’s appearance that suggests it needs a different input than the others. If you’re standing in front of it and nothing is working, that’s because nothing other than the Stab skill will make it respond.
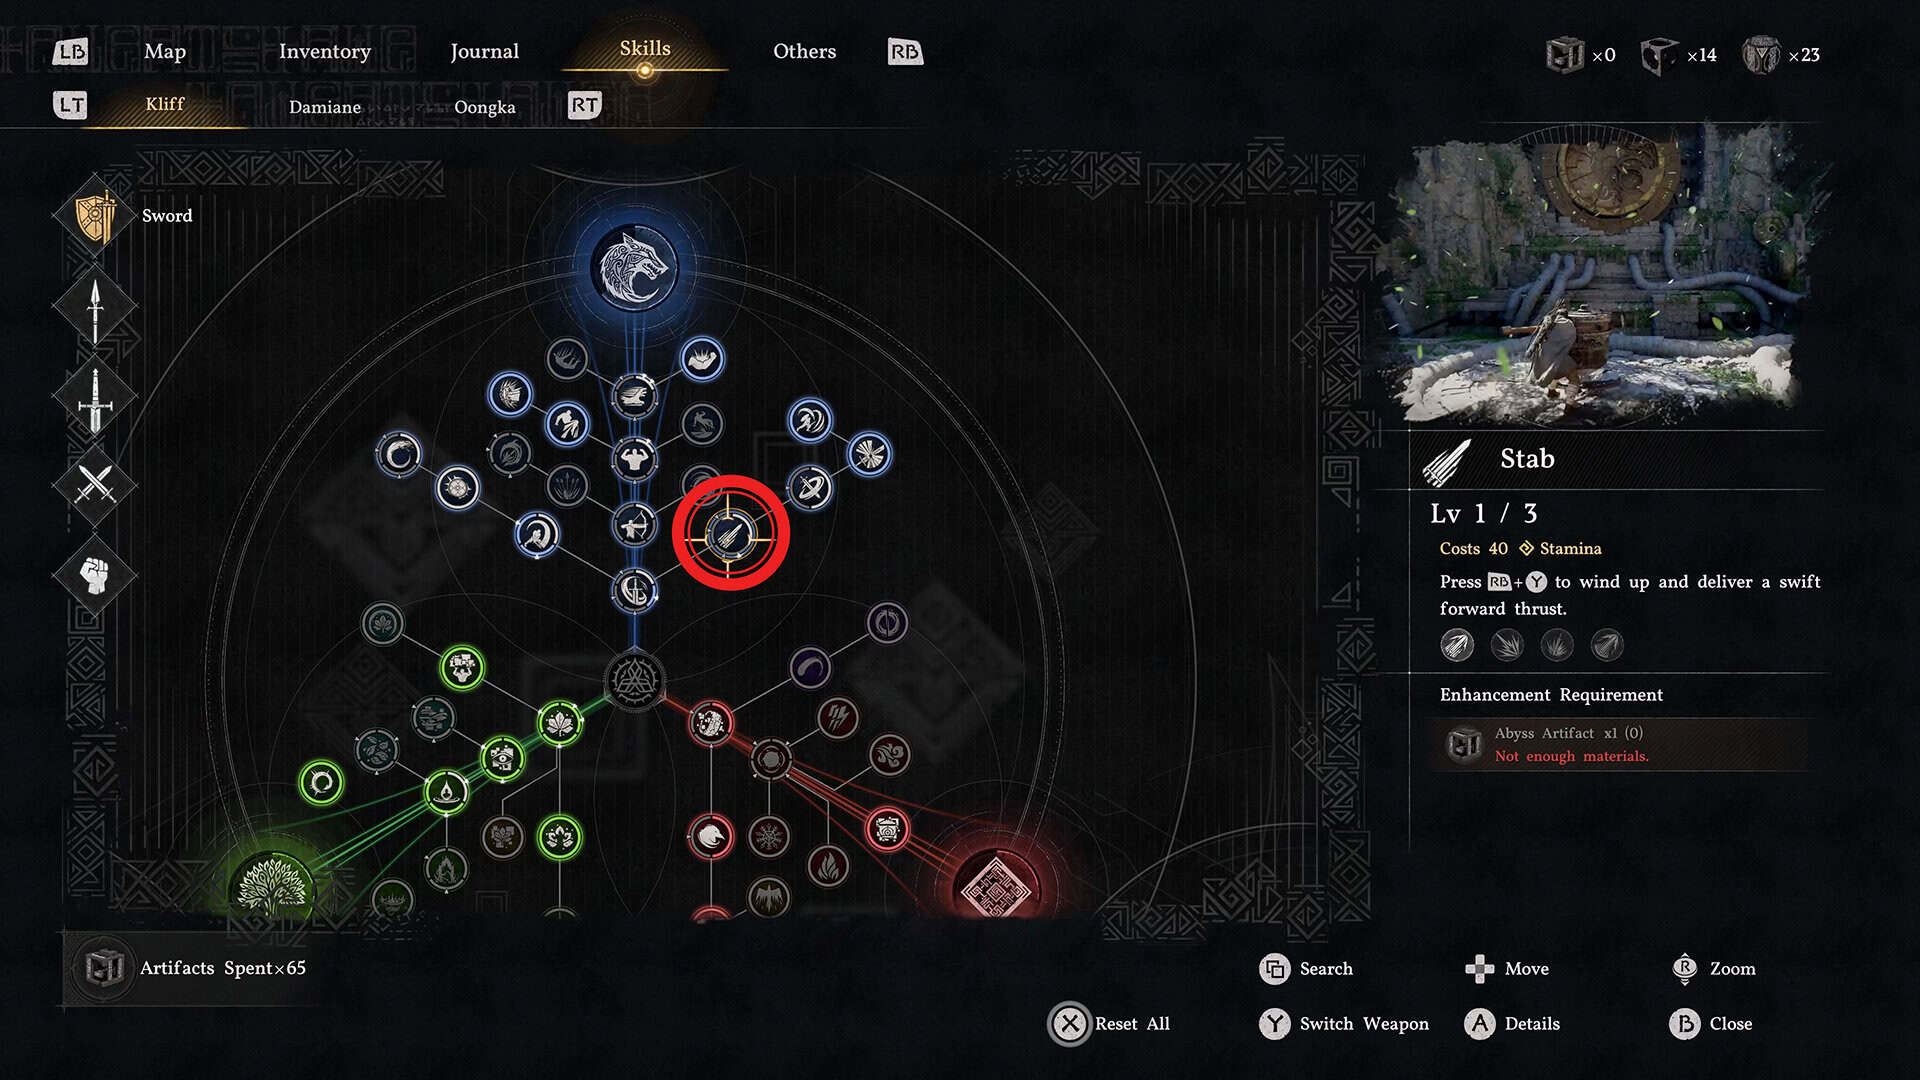
To use the Stab skill on this lever, simply face the lever and activate Stab as you would in combat. You need at least one skill point invested in Stab before this interaction becomes available. If you haven’t put any points into Stab yet, you’ll need to do that before coming back to complete this puzzle.
Each activation of Stab moves the two smaller rings by one step. Depending on where the rings start when you engage the left lever, you may need anywhere from one to several Stab inputs to reach the correct position. Just check the ring alignment against the background symbols after each use and stop when both small rings are covering their target symbols. There’s no shortcut to landing it in one go: it’s a matter of using Stab, observing, and adjusting.
The Stab skill shows up as a requirement in other ancient ruins puzzles across Crimson Desert as well, not just in Trembling Woods. There are similar lever mechanisms in multiple other ruins locations that work the same way. Keeping at least one point in Stab throughout the game saves you the frustration of arriving at a puzzle and finding you can’t interact with a key component of it.
-
- Move the lever on the far right
-
- Move the center lever
-
- Move the lever on the far left
-
- Stab Skill on the Trembling Woods Puzzle
Trembling Woods Abyss Puzzle Reward: Abyss Artifact and Fast Travel
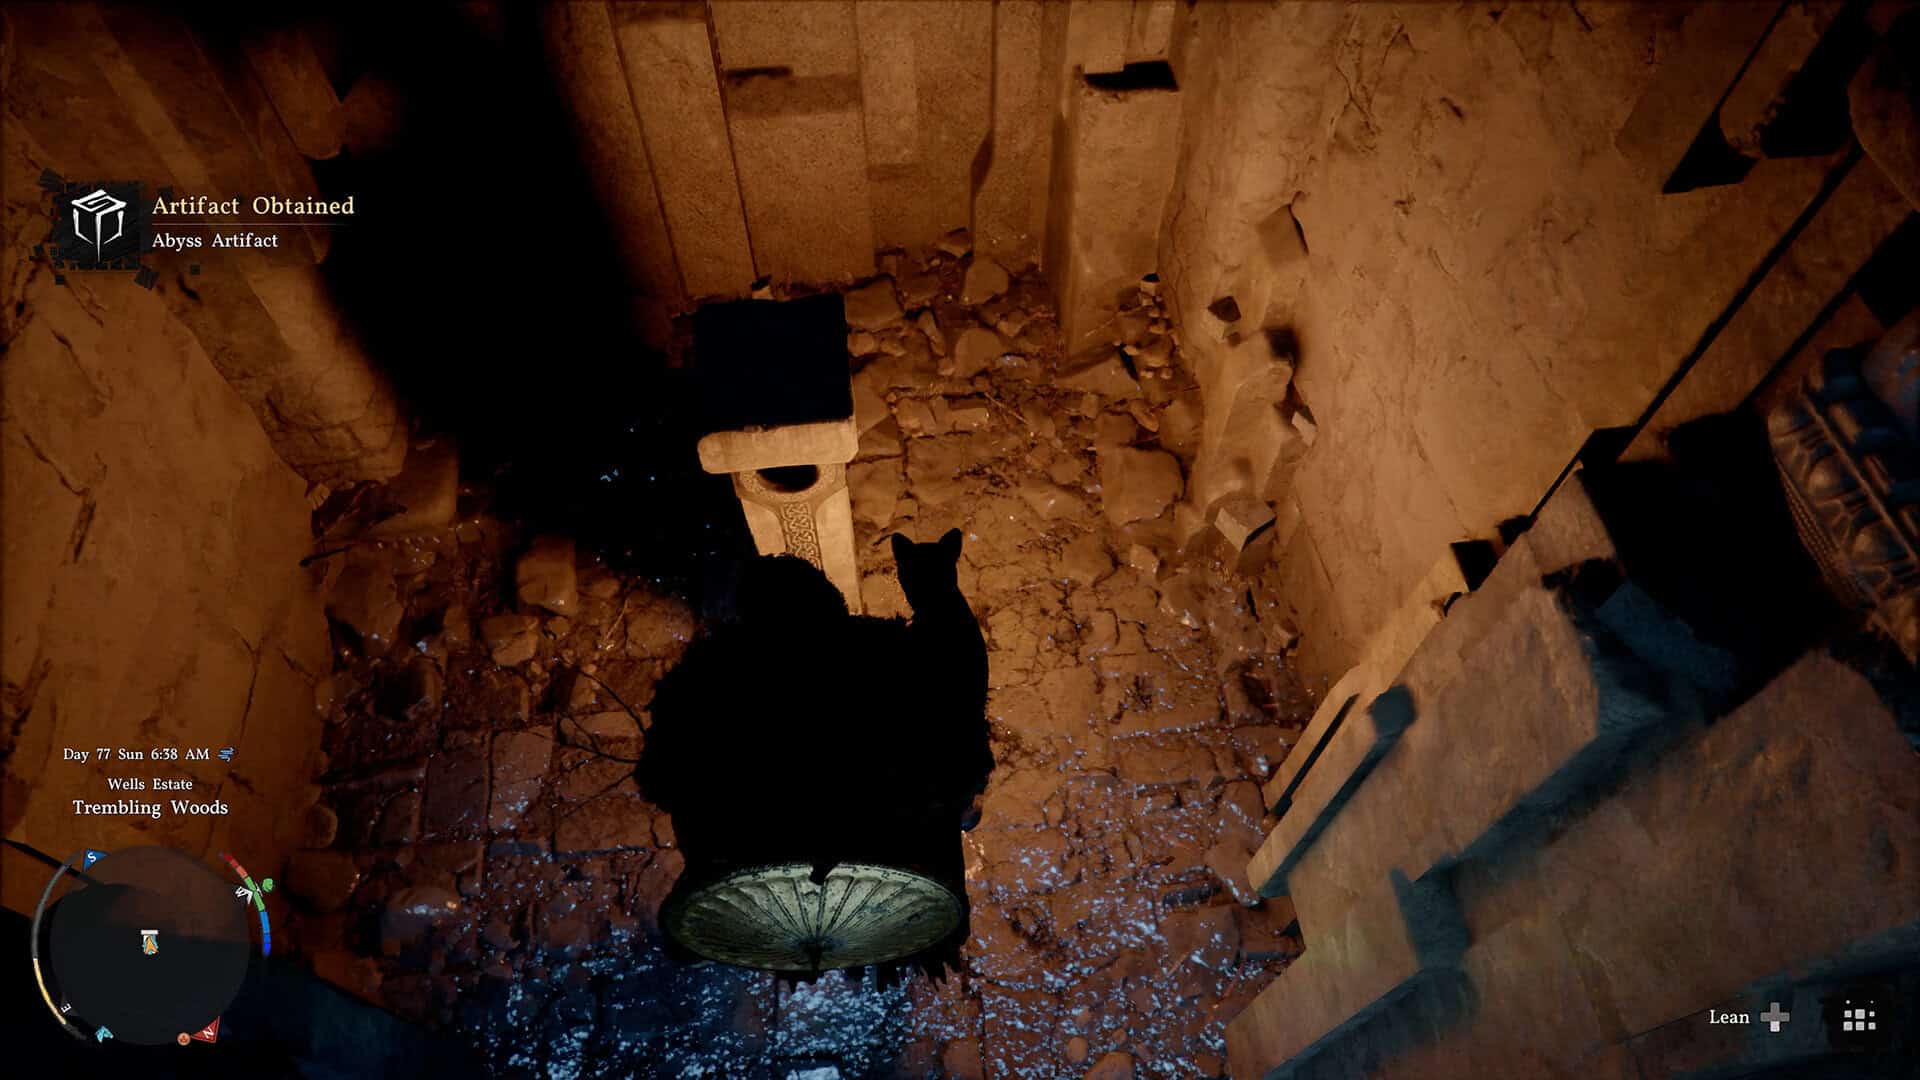
Once the confirmation message appears, jump down into the area below the mechanism to enter the secret room that’s now open. Inside you’ll find the Abyss Cresset. Interacting with it gives you an Abyss Artifact and also activates a fast travel point at this location. The artifact goes toward leveling your gear and skills, and the fast travel point saves you from having to cross the Demeniss region on foot every time you want to come back.
The drop to reach the entrance is short enough that you won’t take fall damage. The camera pulling back at the end of the puzzle sequence is specifically orienting you toward the opening, so use that view to spot the entrance before you jump.
This reward pattern applies to all 37 ancient ruins puzzles in Crimson Desert: every one of them ends with an Abyss Cresset in a secret room below the mechanism, and every one of them adds a fast travel point when you interact with it. If you’re hunting them all down, Trembling Woods is one of the Demeniss region entries in that full set.
Frequently Asked Questions: Trembling Woods Puzzle in Crimson Desert
Where is the Trembling Woods puzzle in Crimson Desert?
The Trembling Woods Ancient Ruins are located in the Demeniss region, in the Wells Estate area southeast of Galleypulley, close to the southern border where Demeniss meets Hernand.
How do you solve the Trembling Woods puzzle in Crimson Desert?
Use the right lever to set the background mural into position. Then use the center lever to place the large ring over the large symbol on the mural. Finally, use the Stab skill on the left lever to rotate the two smaller rings into position over the remaining two symbols. When all three layers are aligned, the puzzle confirms as solved.
Why can’t I move the left lever in the Trembling Woods puzzle?
The left lever requires the Stab skill to activate. It doesn’t respond to a normal grip interaction. Face the lever and use the Stab ability directly on it. You need at least one skill point in Stab for this to work.
Do you need the Stab skill for the Trembling Woods ancient ruins puzzle?
Yes. The left lever, which controls the two smaller rings, only moves when you use the Stab skill on it. Make sure you have at least one point invested in Stab before attempting this puzzle. The same requirement appears in several other ancient ruins puzzles across the game.
What is the reward for solving the Trembling Woods abyss puzzle?
Solving the puzzle opens a secret room below the mechanism where you’ll find the Abyss Cresset. Interacting with it awards you an Abyss Artifact and activates a fast travel point at the Trembling Woods location.
Check out our other Crimson Desert guides on ingametor.com for more ancient ruins puzzle solutions, treasure map locations, and tips for exploring the full world.
-
- Entrance to the puzzle reward room
-
- Trembling Woods Abyss Puzzle Reward